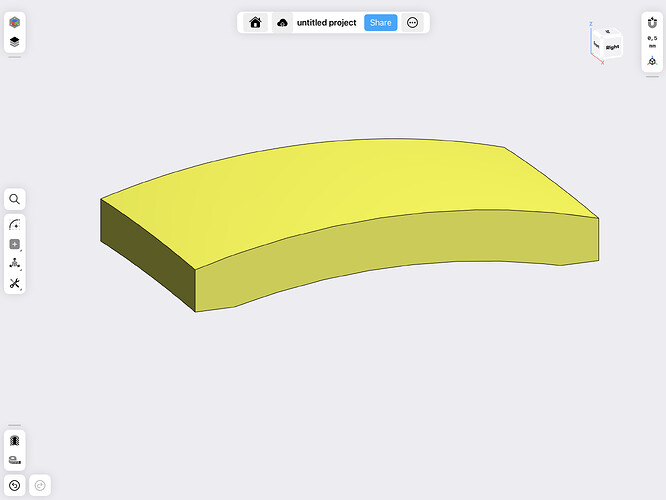
I have my basic shape ready, some in 3D. It is a combination of arcs and lines.
but currently the shape in right view is a rectangle. What I’m needing now is to add an inside arc to the right side and an outside ark to left side of the project in right view. Thanks for the help in advance.
https://support.shapr3d.com/hc/en-us/requests/new
i think you meant to attach a screenshot but it’s missing
As it is a simple rectangle from the side view, it doesn’t seem necessary.
It’d help a lot – or even a simple freehand sketch of the end result you’d like to achieve.
Thanks, this is useful. But I’m afraid it is still not entirely clear to me at which step are you stuck.
Do you have this same side profile sketched / modeled out in Shapr3D already and you’d like to improve it further, or creating this first sketch is what you’d need help with?
So I have the front view all good for this particular piece of the project. I’ve extruded it to a bit more than the width of the piece. But its shape is just a rectangle in right or left view. The drawing shows the shape it needs to be (with a bevel added at the top). I was assuming I need to take from the rectangle to add a curved surface on both top and bottom. But how is this done?
I can sketch this out in the program but how do I merge the two images into one?
No, it is not radial.
But it’s dome?
Is the problem just that the item looks like a rectangle in side view on the drawing? If so, it would be expected to look that way.
So this is close to my drawing. So how do I merge it with the front view drawing (which is nothing like a rectangle)?
I still need to know how to merge the top view with this one. It’s shape is a good bit more complicated than this one.
Hi @Jadewatch ,
It would really be easier for people trying to help you if you had a sketch showing the end result you’d like to achieve as @Peter_Gy suggested earlier.
I will guess that by “merging” you mean make that shape from the top. Try this:
- Add a construction plane parallel to the top (x-y) plane and place it above the body you want to modify.
- Sketch the shape you want to have from the top view.
- On that same plane, sketch a rectangle larger than the body you are modifying. At this point you should have two selectable faces, one with the complex shape, the other a rectangle with that complex shape missing.
- Extrude the rectangle with missing complex shape down, through your body to modify. By doing so, the extrude will automatically be subtracting material from the body to match the shape.
Is that what you are looking for?
Bob, as I’ve mentioned, I sketched the top view first, including an extrusion. I assume that I need to remove that. Can I then transfer that sketch to this parallel plane?
As long as that top view does not intersect the body, you can leave the sketch there. If it does intersect, you will need to move it up or down so it does not intersect. Hide or delete the extruded body from that sketch.You will need to add to that sketch a rectangle (or any other closed shape that is larger than the body you want to modify.
When you extrude, it will start making a new body, just keep going and when it intersects the curved (lens?) body it will automatically subtract.
Here is a short video:


