The precision and speed possible with Shapr3D on tablet with pencil is amazing. I can sit back and relax and make great progress with the occasional spare hour or so of time I have available.
Added a bit more to the brake master cylinder and started on the motor, a hub type in the rear wheel.
I redid the motor parts as they were too close to the wheel. Added a charger socket and cover flap under the rear of the body.
This is absolutely awesome! Well done. X
Thanks WB, and welcome to the group ![]()
I should add that I’m making this up as I go. I’m a biker myself and it’s nice to be able to imagine something up and just do it in Shapr. If I can do this humble project with my limited experience, so can anyone.
I’ve been saving the main storage cubby lid and handle and the battery pack cover until now as I had to think about how to make them. I wanted the outer face of the main cubby handle and housing to have the same shape as the lid, and as you can see in the picture the lid isn’t flat. The sketches for the handle and base are obvious. I used the sketches on the right and lower left of the bike to make the lid and also to cut across the face of the handle components so their shape is same as the lid.
This first pic is the battery cover.
Storage cubby lid and handle below.
As you can see, the handle follows the slight curve of the lid.
I’ll post pics of it with materials added in a few minutes.
Last pics for today. Main storage cubby and the smaller one, lids open so we can peek inside.
Room for a large iPad or laptop bag in the main cubby ![]()
I’ll be adding hinges to the lids at some point, and innards for the latches.
Crazy amount of details! ![]()
![]()
I’m back in work today after a few days off, so updates will be a bit less frequent due to having to work for a living ![]() .
.
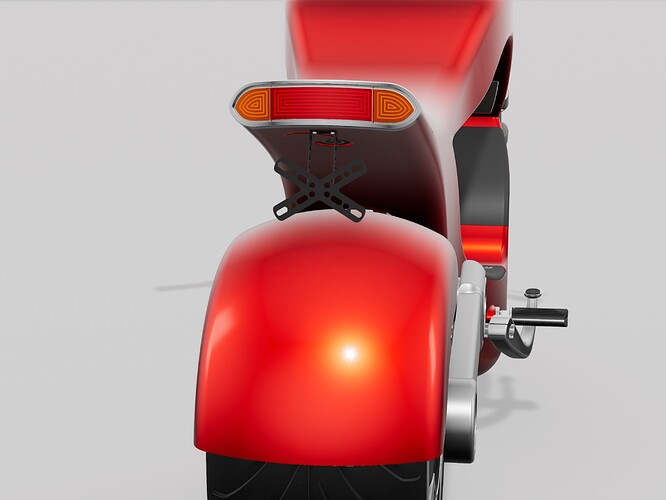
So for now I’ve managed to get a start on the rear light and these couple of pics are for checking out the basic shape in visualisations (an excellent function in Shapr3D) to make sure I’m happy with it before putting more time into it later.
Rear lights and turn signals inside the lens, sitting in what will be chrome housings.
The shelled lenses.
Number plate light under the main rear lens/cover.
Rear lights before I add bulbs, and without the outer lens. I’m not sure if I will add the lens now as it seems superfluous.
After much chopping and changing around with the rear lights, I’ve settled on this design. I think ![]()
i


