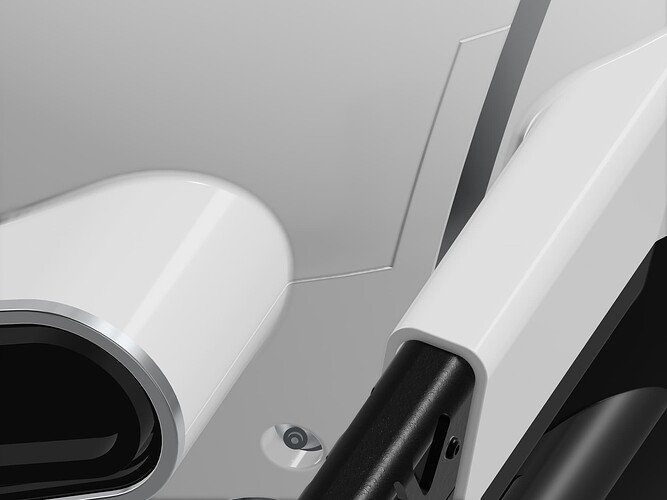
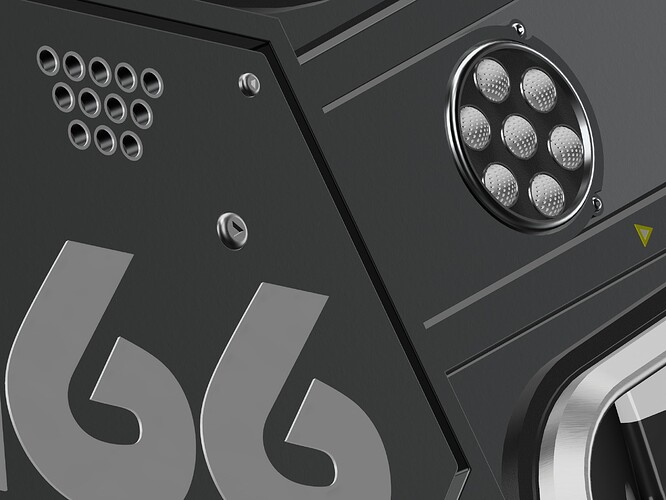
Hello stephen, do you have a raytracing renderer ? For this work the rendering in physical mode would be exceptional (Vray, Atlantis, Keyshot ?).
Yes Marc, I have Keyshot on my desktop computer. After I finish the drone 100% in Shapr3D I intend exporting it to ZBrush to add polygons and create UV’s and then add dirt maps for realism. Then over to Keyshot for rendering in a custom environment. I’ll post pics here when it’s done.
Hello,
Can you show us the Map in Zbrush (screen copy). This is still a mysterious area for me in practice. But in object design it is really necessary, especially for wood, marble etc, and organic or natural materials. I tested them in Stager but the result seemed very complicated even for the simple shapes from Sharp.
Yes I will. Once I finish the front panel I’ll do the UV map and oust it here. For now, I’d suggest you download the free version of UV Mapper and play with it.
I have time to resume work on the front panel of my drone. After initially scratching my head about how to go about it, I think I’ve worked it out.
I used the new Pattern tool to quickly generate the sketch to make the small holes in the second image.
I’ve put a couple more hours into the front panel parts today.
I can finally see light at the end of the tunnel and the rest of the work is really just minor detailing before I UV and texture it.
I’ve more or less finished the front panel. Just some small details there and then some panel join lines around the main drone body to do. I’ve added some personal touches to the drone along the way, while trying to keep its character and expression. I’ll post pics with materials applied tomorrow. For now, here is where it’s at.
What do you miss from Shapr3D’s Visualization that makes you go to cadmio?
Cadmio is much faster to use, and easier to find and use materials. Also it has paint materials with metallic option. Shapr does glass better and some other things too (such as large files open much faster) but I find it cumbersome when using multiple materials.
I’m actually adding Visualisation materials to the drone at the moment for comparison. I’ll post pics here later.
That’s very interesting, thanks for sharing. Why do you find it cumbersome when using multiple materials? Some comparison screenshots would be fantastic.
By cumbersome I find it hard to scroll down materials without accidentally hitting some of them. The blue overlay staying on parts until we click them after applying materials makes it hard to see if the material was added. I’d like to see that blue overlay disappear as soon as material is added to a part.
One thing I miss in Visualisations is being able to adjust the colour of metal, for instance bolts and screws, or gun barrels. Also I applied powder coat paint finish to the gun housing in the Cadmio shot as you can see below.
In Cadmio I was able to subtly change the colour of the front panel steel material and the screws. It means that parts of the same material on the panel of same material are very easy to see.
The clear glass cover over the red glass iris doesn’t show the iris material in Visualisations, whereas it does in Cadmio. However, Shaper glass looks better on its own.
Very helpful, thank you for sharing! Did you know that you can also drag and drop the materials on your bodies, not just select the bodies and tap on the materials? You just need to long tap+drag a material on a body. That might help with the accidental material assignment.
Thanks, nice comparison!
Most problems you mentioned are in our todo list, some will get improved soon. ![]()
While most metals aren’t colorable at the moment, Anodised Metal is, did you try that one?
Thanks guys. The anodised material is cool, just wasn’t needed for this project. I wasn’t complaining btw, I love Shapr3D and it just keeps getting better all the time. I’d never have gotten this far so quickly with any other software. Thanks for all the work you all put into it.
Small details now, such as some panel join lines on the main body. Sketched and extruded parts and then extracted them from the body.
I’ve added almost as much detail as I need before I export and then add UVs so I can make texture maps.
Front panel components;
I’ll do the same in Visualisations tomorrow and post comparison images.
Insane amount of details, very cool model!
This is the final version of the drone and the final batch of images, this time all done in Shapr3D Visualisations as promised. I made changes to the main eye and the trim piece around the edge of the shroud. All materials and renders straight from Visualisations.
I have to admit that I’m very pleased with the realistic results and I believe Visualisations is improving in leaps and bounds. You can judge for yourselves.


