Hello everyone. I am a product design engineer. My job involves engineering products such as chairs and armchairs. Sometimes, I start from photos, and other times, I come up with the designs myself. Shapr 3D is fantastic, but despite my efforts to use it, there are some shapes that I can’t seem to create. Let’s take, for example, the frame of a chair’s backrest, as shown in the photo. It’s made from steel rods, but I’m not sure how to create the design. I have no idea, even though I’ve tried using commands like LOFT or SWEEP. Can you help me? Thank you.

hello Matteo! i did a similar project earlier, i modeled a bike rack also made from steel rods. i ended up using the sweep tool a lot, i drew a small circle and after selecting the face and the sketches the sweep tool created these curved cylinders for me. they mimicked the steel rods perfectly, i even 3d printed one as a dummy rack for sewing.
- project a simple sketch onto a cylinder:

- select an edge first then use the add plane tool (it’s gonna be perpendicular to the edge automatically:

- draw a circle on the newly created plane, select the face and the edge and use the sweep tool:
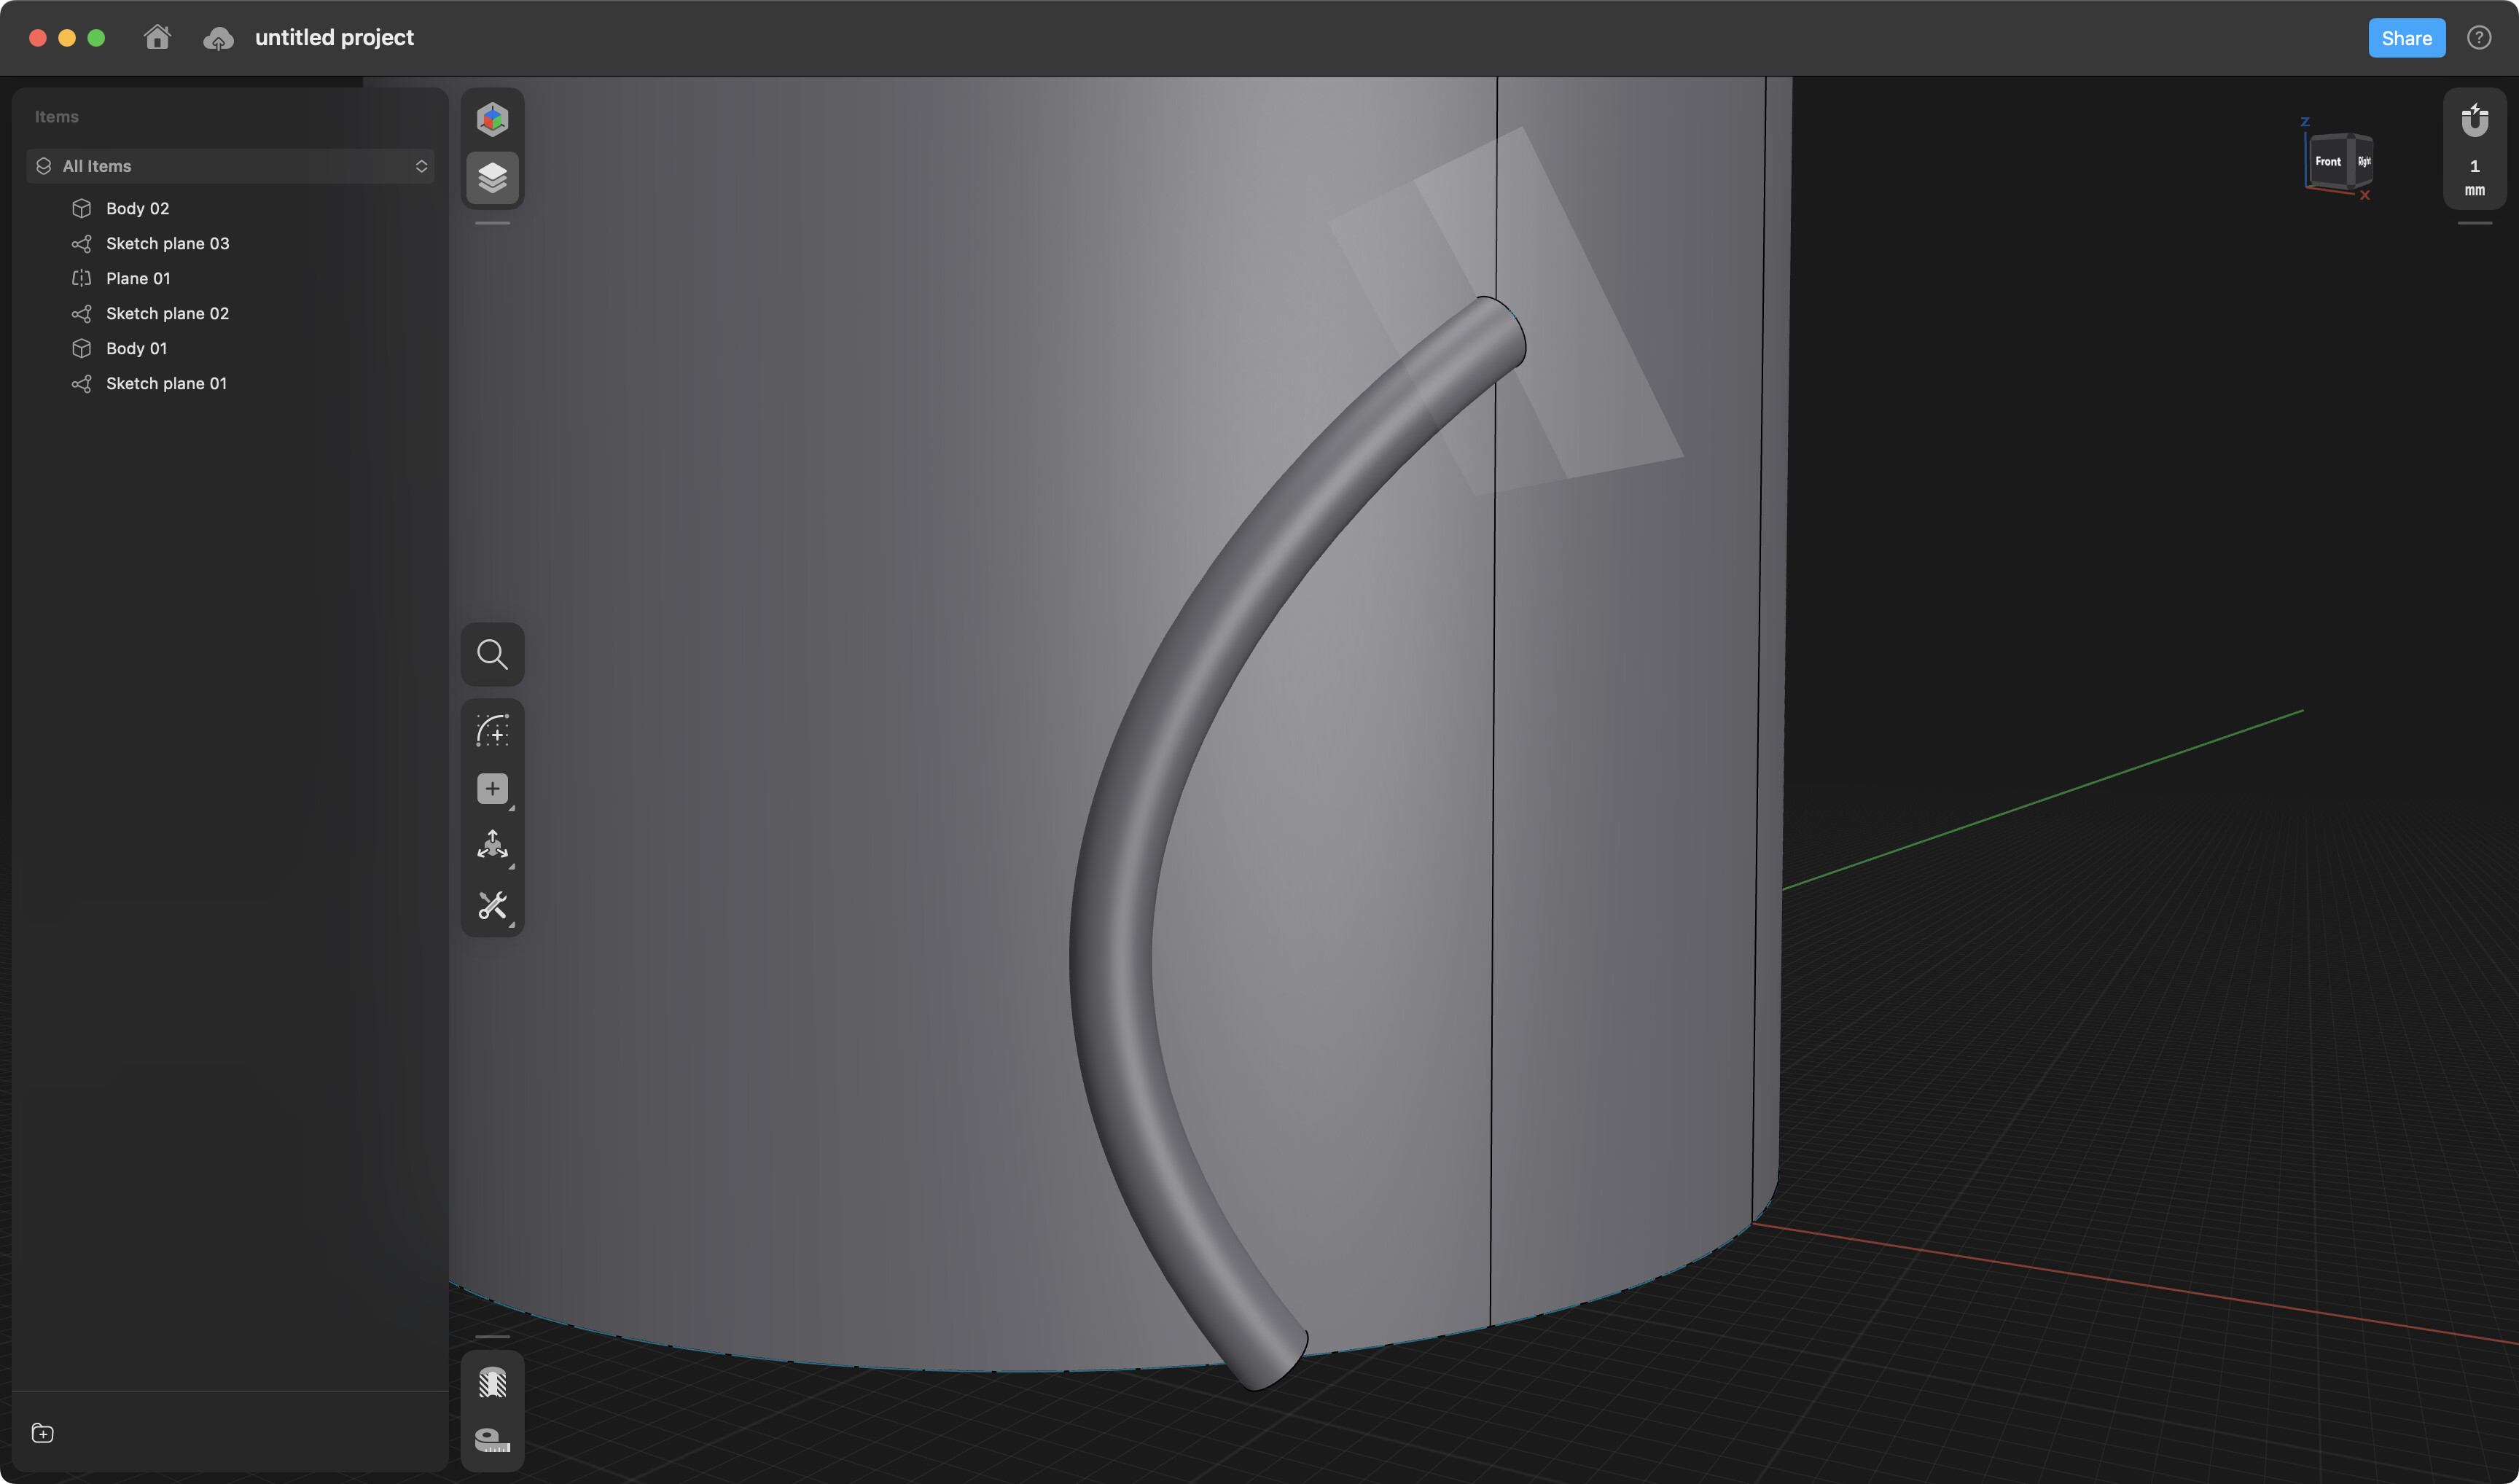
- repeat this with all separate curves. a “separate” curve can contain multiple lines, you can select more before using the sweep tool. you can think of a separate curve as what you’d need to have as a separate steel rod. no junction for example. in this case you need to have 4 planes with 4 small circles and 4 bodies:

- hide the cylinder and the sketches, and finally merge your bodies. you can even add steel material in the visualization mode:


Nice job. Interesting in that as I read the initial post, the cogs in my mind started to turn in figuring out how I would model it. Reading further down to your post and BAM, that is exactly what I would have done. Again, nice work.
thank you Mike, it means a lot!
Hey @gex , it looks like your model is ready to weld. Err, looks like it has been already! Very nice!
Thank you so much for your suggestion! It’s really helpful to hear about your experience with a similar project and how you used the sweep tool to create curved cylinders. I’ll definitely give it a try for my chair backrest frame design. Your input is greatly appreciated!
I wanted to share how I created my first prototype without any initial drawings. I understand that it’s not the recommended approach, but for now, I’m still in the process of learning how to use Shapr 3D for fully modeled designs. I believe that step by step, I will become more proficient with the software and be able to start with well-drawn ideas in the future. In the meantime, I’ve found that this hands-on approach has been a valuable learning experience.


The round steel frame is used to create the structure, then it’s covered with fabric, layers of foam, and finally, the cut and sewn fabric is applied. The art of upholstery adapts to the various curves
That visualization looks real! ![]() . Nice job!
. Nice job!
Is that a visualisation Matteo? It looks like the real thing to me.
Yeah, that looks like the real thing. What was I thinking? Stephen, your visualizations look fantastic!!
Excuse me, I’m not familiar with chats, and I’m Italian. The pictures of the chair are not renders but photos of the real product. As I work in product engineering, I find myself doing reverse engineering more often. I’m learning to use Shapr 3D to create the model, but I think it’s a long journey. Thanks to everyone