I need your advice in dealing with volumes that have a curvature that cannot be produced revolving a shape around a axis. I find very hard to produce accurate and predictable results for such surfaces. Usually I cannot build them using booleans and rely on lofts of mutiple shapes.
Even something as simple as a squashed revolve suface is a challenge.
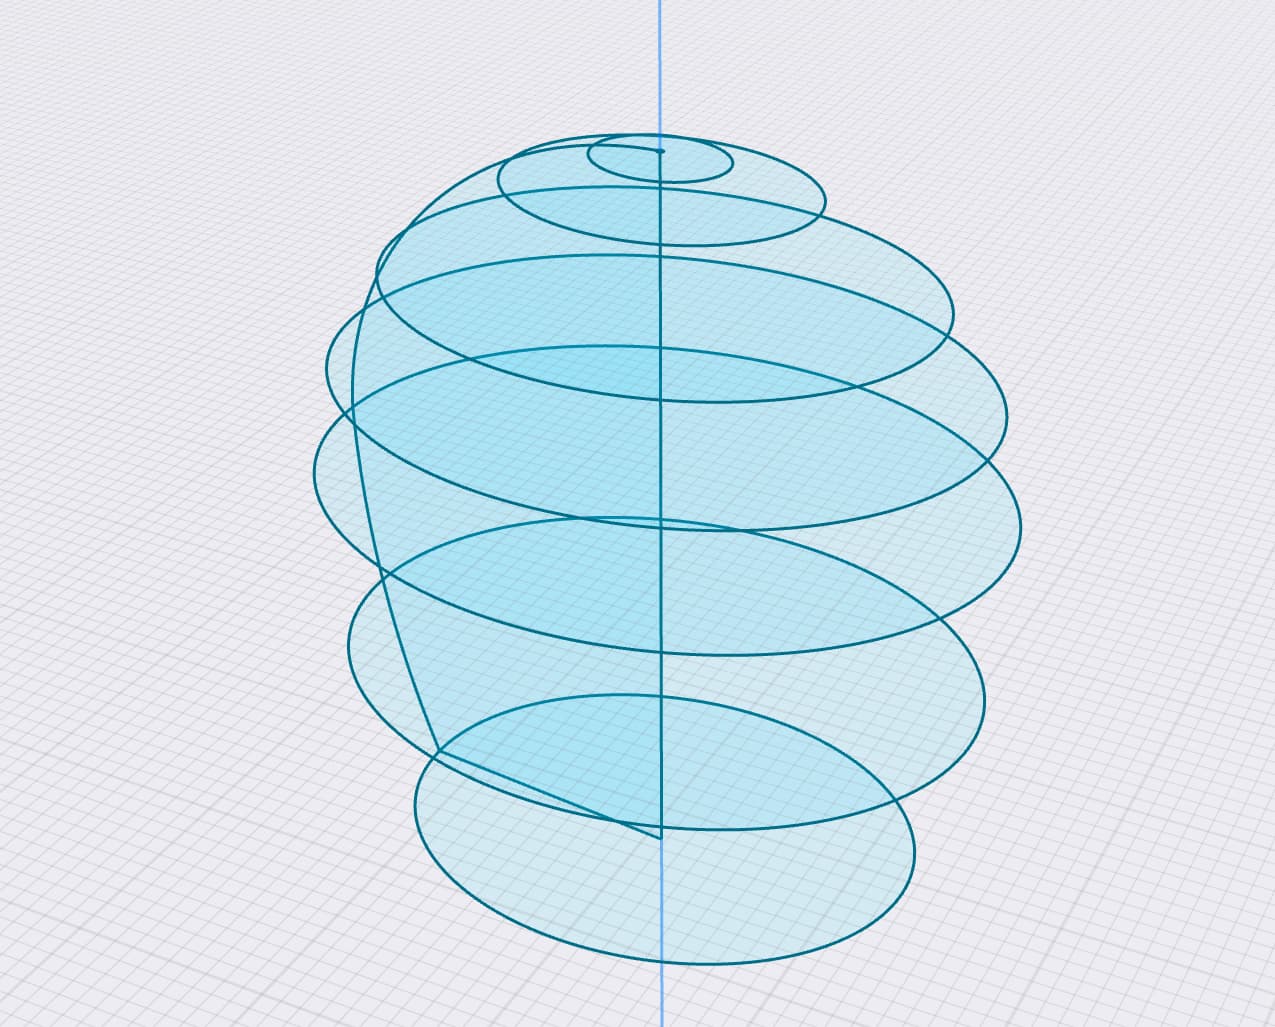
For instance here I’m trying to make a shape that is basically a non-uniform scale of a revolved sketch. Shapr doesn’t support non-uniform scale so in order to that that radius difference I rely on mutiple sketches. The problem I have is very hard to control the curvature this way, because the loft itself is unpredictable and second because I cannot scale-snap the sketches to a profile curve, I basically have to zoom in a lot and match them as close as possible.
This is a simple case, but I run into this issue quite often, when curvature varies in different directions
I have a very similar project well more than one, I am looking forward to see what explanations and possible solutions are shown. It is very tricky to do these types of shapes.
Yes, this is a challenge. In the mean time, looking over over posts in the forum I discovered they added “guided” loft. You should check that out, basically it allows you to control how loft is interpolated between sketches. It doesn’t solve of issues with this kind of surfaces but it definitely helps.
I have tried the guided loft but how does it work when the x and y dimensions are different, and then how does the curved dome shape at the end get formed?
I don’t know what kind of curvature you are trying to achieve, but I would say guided loft is your best bet for complex curves. Although the trade off here is that you will most likely end up with lines on your body.
Then I loft the four quarters, and add the bottom and mid curves as guides at the end of the lofting process. I don’t use the controls points of the loft tool.
All the curves are fit splines to ensure the points between planes are the same, or the loft command would fail. The ellipses are also fit spline, I just placed a point at the 4 extremum.
Thank you, your reply is super helpful! I managed to make the following shape, however I had to use a top sketch in order to complete the shape but it seems you haven’t. Can you please make a short clip of GIF for a quarter of the shape to see how you made the first lofts?
Hi
Here how I proceeded, the key point is that elements that are shared by two orthogonal planes must be perfectly at the same position. Almost the same is not good enough. The loft tool has no tolerance at all on this aspect.
1- create a spline curve in fit mode. This is important because we want the curve to pass exactly at the control points. Ensure the tangent on the top is horizontal if you want a smooth surface. Lock the curve. This is important because we don’t want it to move later on.
2- create the vertical and horizontal lines to close the shape and lock them.
3 and 4 : mirror the spline regarding the vertical line.
5 : leave the sketching view and click on the top point (intersection of the 2 splines and the vertical line) : the original spline + mirrored one + vertical line must highlight, which proves they are connected.
6 : select the splines and the vertical axis, and make a 90° rotation around axis with copy
7-8-9 : this is the key point : the two perpendicular lines are not always connected : click on the top point of the rotated splines (7), move this point up (8) and then back to the original position (9).
Now, the 4 splines highlight and there top point is the same.
10- lock this top point so it won’t move anymore.
And now go the the newly created sketch and edit the shape of the splines.
More generally, I do the 7-8-9 check at every point that is common to several sketches planes, because you don’t know for sure to which the point belongs to.
@PEC Many thanks for your advices. I don’t know how you do the lofts without the pole sketch but your information you provide is super helpful. Thank you for taking the time to answer!
This is a model I made following your advice, using loft with assisting guides.
You are welcome, thank you for the feed back.
Your helmet is wonderful! Can’t wait to see it with material
I upload the .shapr file I did so you can try loft without the pole sketch. Guided loft.shapr (582.4 KB)
Apologies for reviving an old thread from the dead but regarding your model, how exactly do you “loft the four corners” – I downloaded your file and am having trouble getting it to loft. I was unclear on what you meant by “and add the bottom and mid curves as guides at the end of the lofting process” – any way I tried t select faces and guides I couldn’t get it to loft. What am I doing wrong here?
Thank you for this speedy and informative reply – when building, do you always start with your arches or your horizontal circles? Previously you mentioned arches, but I’m having trouble getting my horizontal circles to align to the arches – am I wrong assuming that they (the horistonal circles) have to be intersecting with the arches or is it fine regardless of sizing/intersection of the circles (within reason)? The lofting tool really needs its own dedicated deep dive on tutorials barely scratches the surface on dos/donts and general best practices
you are welcome.
Yes, you are right assuming the guides must intersect perfectly the contour of the faces used to loft. Absolutely no tolerance is allowed by the tool (which is really painful) so you have to ensure a way or the other that it is the case.
What I do is to move a little bit the guides or the surface around their original position and set them back at the original position: this trigger the “connexion tolerance” of shapr3D, and it connects the lines together. The behaviour of this has changed also a little bit over time, due to changes in the user interface so it is less easy than it used to be in my opinion.
So, again, the guides have to intersect perfectly the contour of the faces and have to be connected to the contour of the surface.
I will try to add a video later on, but can’t commit on the schedule