Another possibility would be to use Prusa Slicer (free). There you can split your body and add alignment pins (various types) that will automatically create the alignment holes.
Looks like quite a complicated model for 3d printing but entirely doable. If I may offer some suggestions…
I would divide this into 7 separate parts by doing the following.
-Split the body using the center “Hub” circumference as one part.
-Then split the “Fin” into 2 parts so that there’s a flat surface for printing on to eliminate the need for supports.
-You can then add pins or offsets to create profiles that align the parts where they would intersect.
Edit: Since the fins are all the same you only need to modify one of them and print the parts 3 times. Then use the circular pattern tool on the hub for the alignment feature.
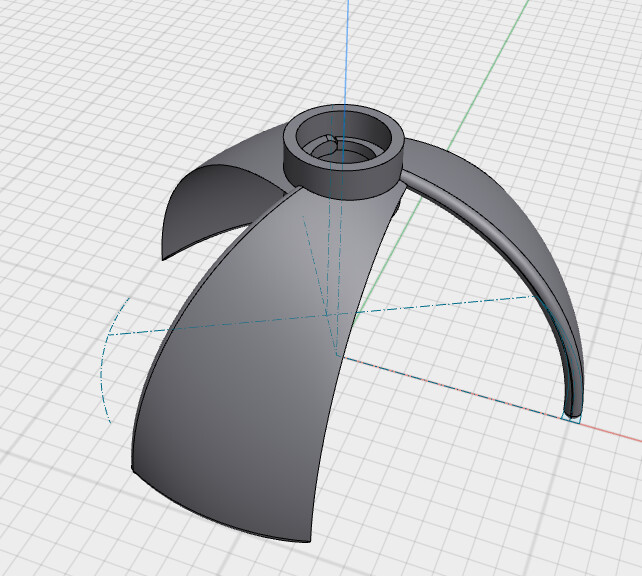
The screen shot above is somewhat representative of what I want to create. I would like to split the hub into 13 parts. A central hub and each of the 3 blades divided into 4 parts. The blades will be split down the length and across.
Not sure how large the part is, but if its of a reasonable size I would print it a couple of ways.
I assume you are FDM printing as opposed to resin printing.
First, I would do a test print with the part positioned upside down and use supports. To maintain stability use a brim. Then evaluate if the support remnants are an issue.
The other method would be to split as you like however why not print the 3 blades whole, on one edge, again using a brim for stability. Four parts on the print bed.
Is your intended ‘Lego style’ pin assembly permanent?
Hi Mike.
I’ve printed the above model, (I sized it so I could) using PLA, upside down as you suggested, without adhesion, and 50% support. It printed fine and is happily rotating at about 500 rpm. The model I intend to print is a half a meter in diameter. not 200mm like the previous model.
The pins are permanent the parts super glued together.
Lego type pins can work but you’ll need to fine tune the fit given 3D printed tolerances to deal with. Would you consider a simple lap joint for a positive fit and alignment? Here’s a Q&D example. Also shown how it could be printed.
It can be done in Prusaslicer, but it’s much harder to control. Much easier and repeatable in Shapr. If you can share the model I can modify it how I’d do it. I’m sure @TigerMike and maybe others would probably also give it a go so you have options, or at least examples.
This can get you started https://help.prusa3d.com/article/cut-tool_1779
As Alex and Mike have suggested, you might be better off in Shapr3D. In S3D, you can split a body with a face, so if you select, for instance, the cylindrical hub, you can use that as a splitting surface.
Piggybacking off this, it’s also easy to selectively align things. ie, using a 3 point plane for instance can get you on the edge of the fillet, then you can move and rotate that plane into the final position dimensionally. Overall much more control. In Prusaslicer it’s very difficult to align the splitting plane accurately and can only be done in a plane, not on a round surface as mentioned above.
Bob, thanks for sharing the link. I have 3 Prusa printers and Prusaslicer is top notch. The only unique features I’ve used so far is adaptive layers and ‘painting’ areas for localized supports. Thanks for the tip!
Hey Mike, a couple others you might want to look into… Prusa Connect. It integrates with PS and their newer printers. Instead of exporting your gcode, you can wirelessly send it directly to your printer’s queue, putting the code on the printer ready to go. No more “usb-sneaker lan!” Another is putting text or svg files on your prints. Easy to wrap on weird shapes so you can emboss along a contour.
Enjoy the rest of your weekend!