Hold on to your butts. This post is a bit of a doozy.
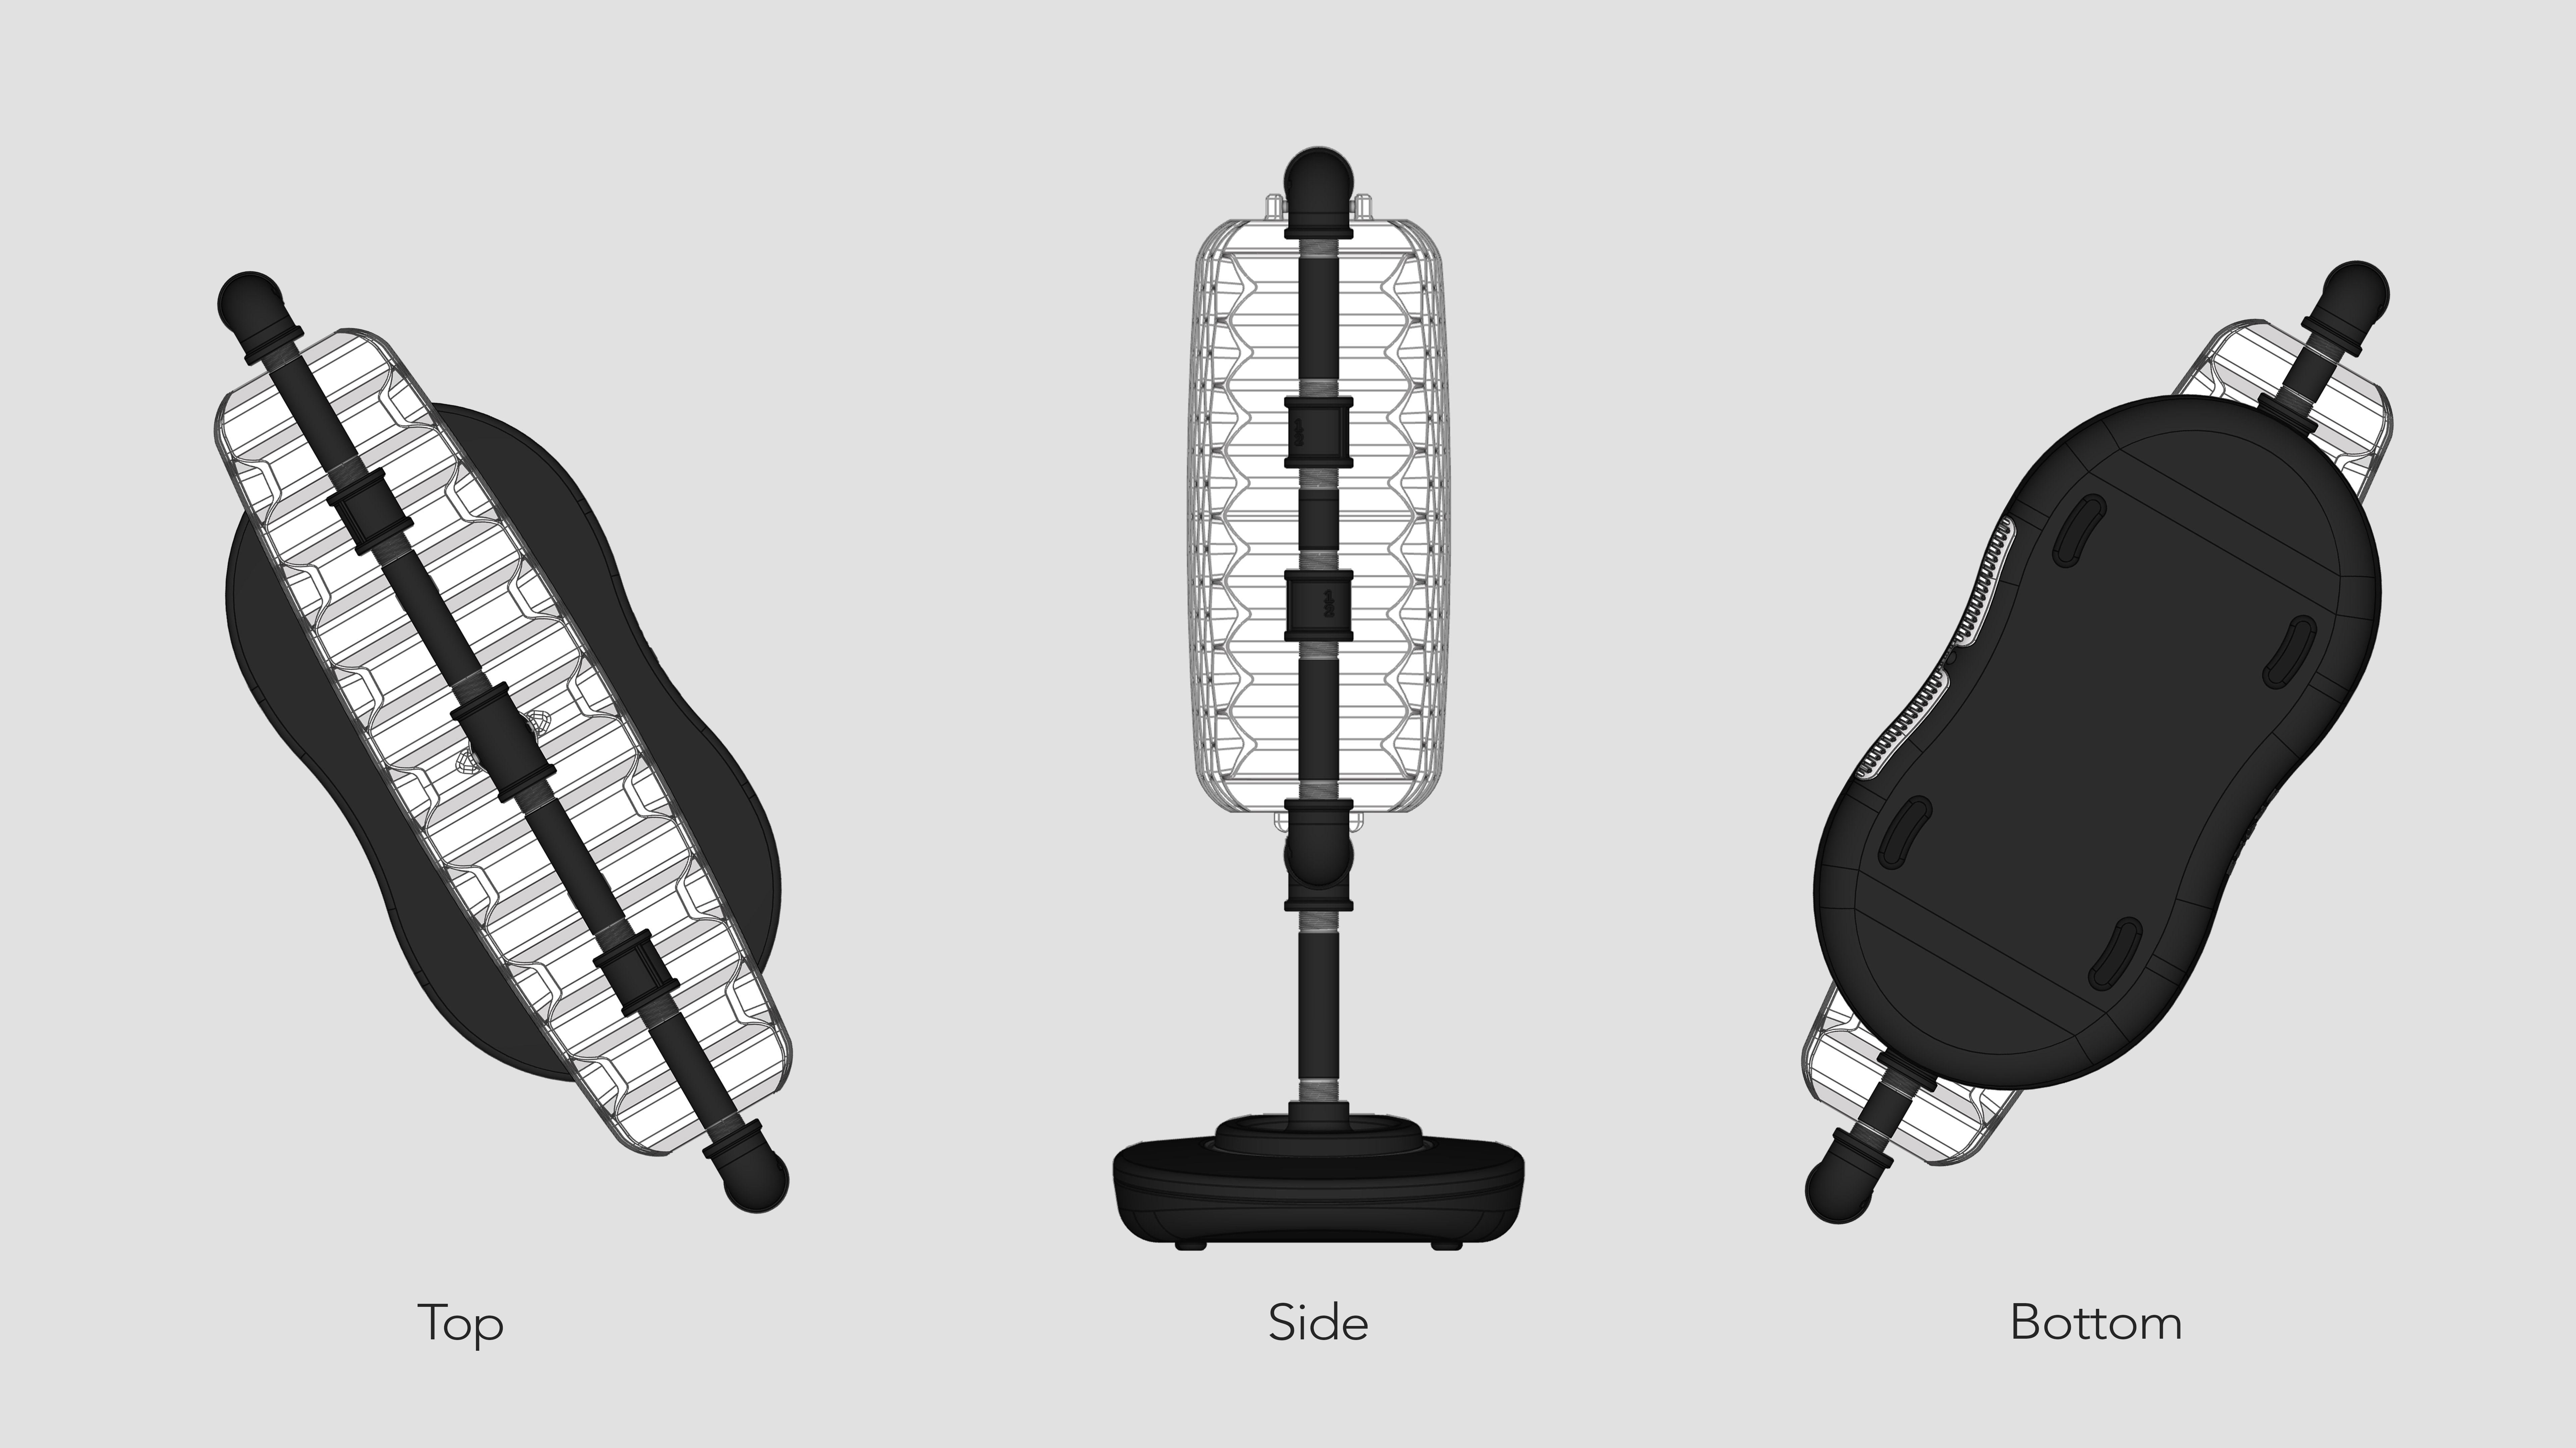
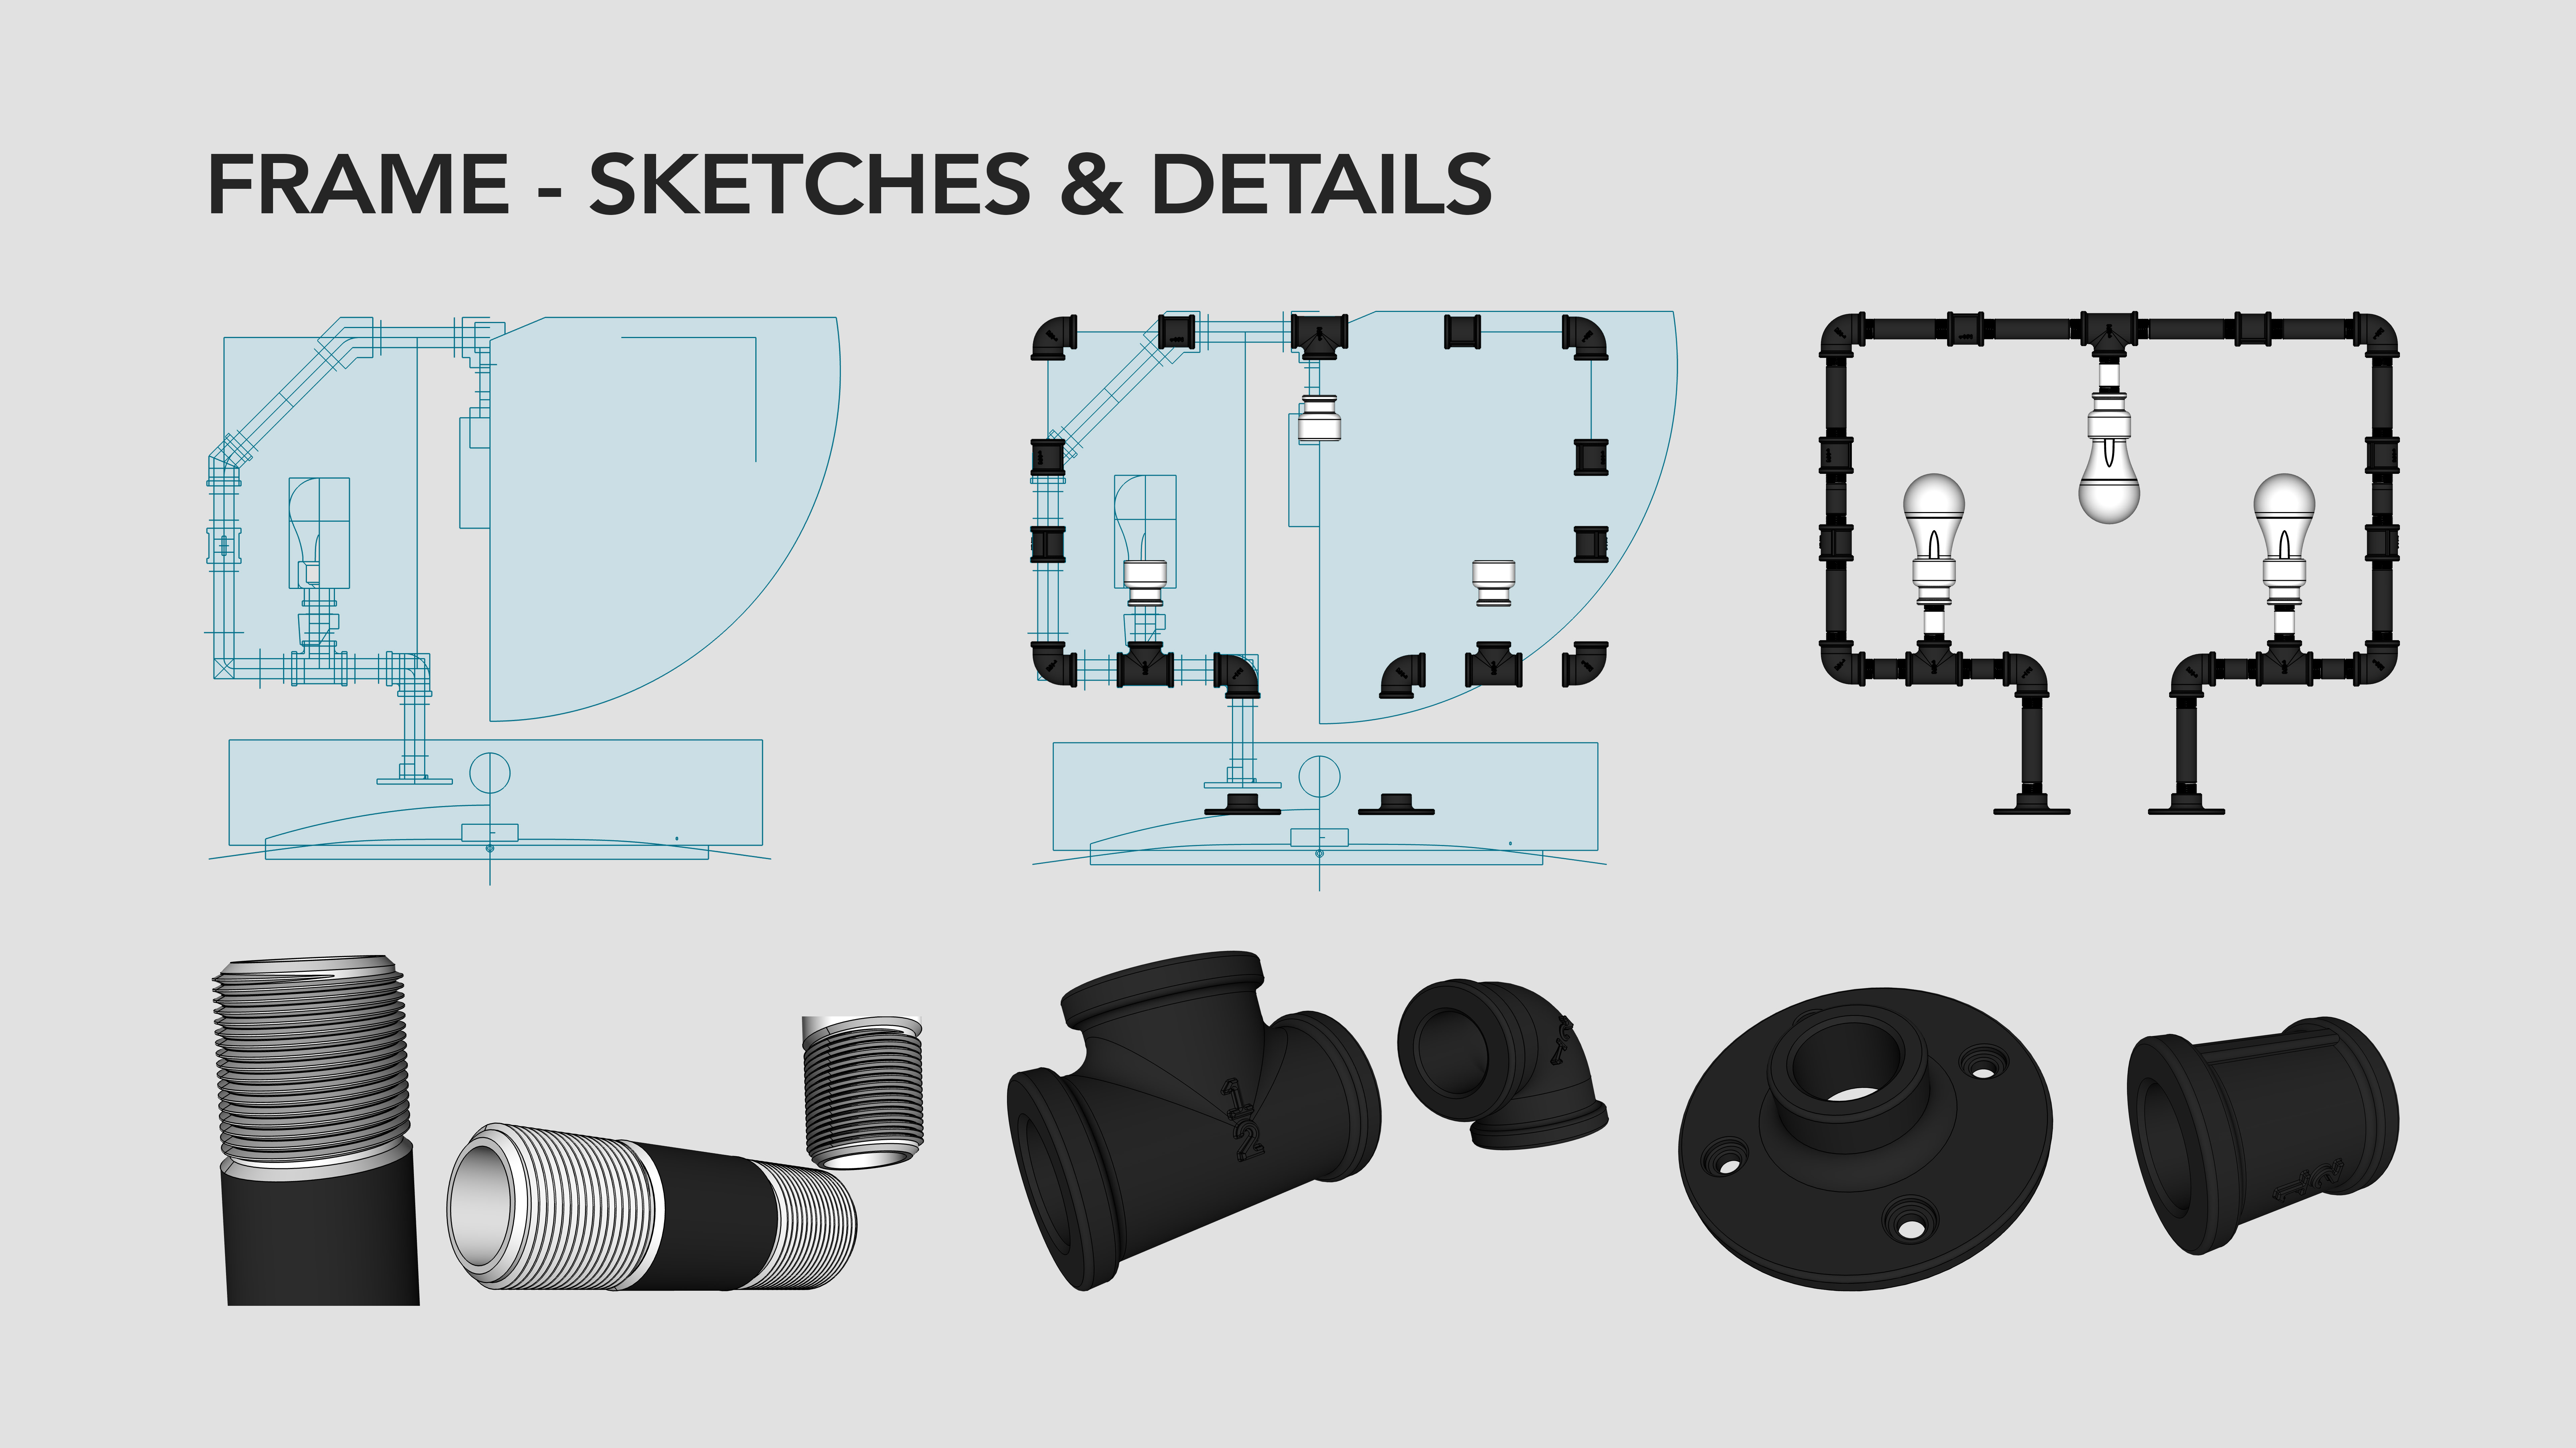
Over the last two weeks I designed this lamp completely on Shapr3D, mostly hanging out at a local cafe patio. I had a blast trying to figure out some of the surfacing issues using only solid body modelling. I’m proud to say that while making the lamp shade, I crashed the app at least 20 times haha. I can also say that every single tool offered by the Shapr3D app was used at some point for this project. I thought to add some Keyshot/Photoshop renders at the bottom for fun.
Materials:
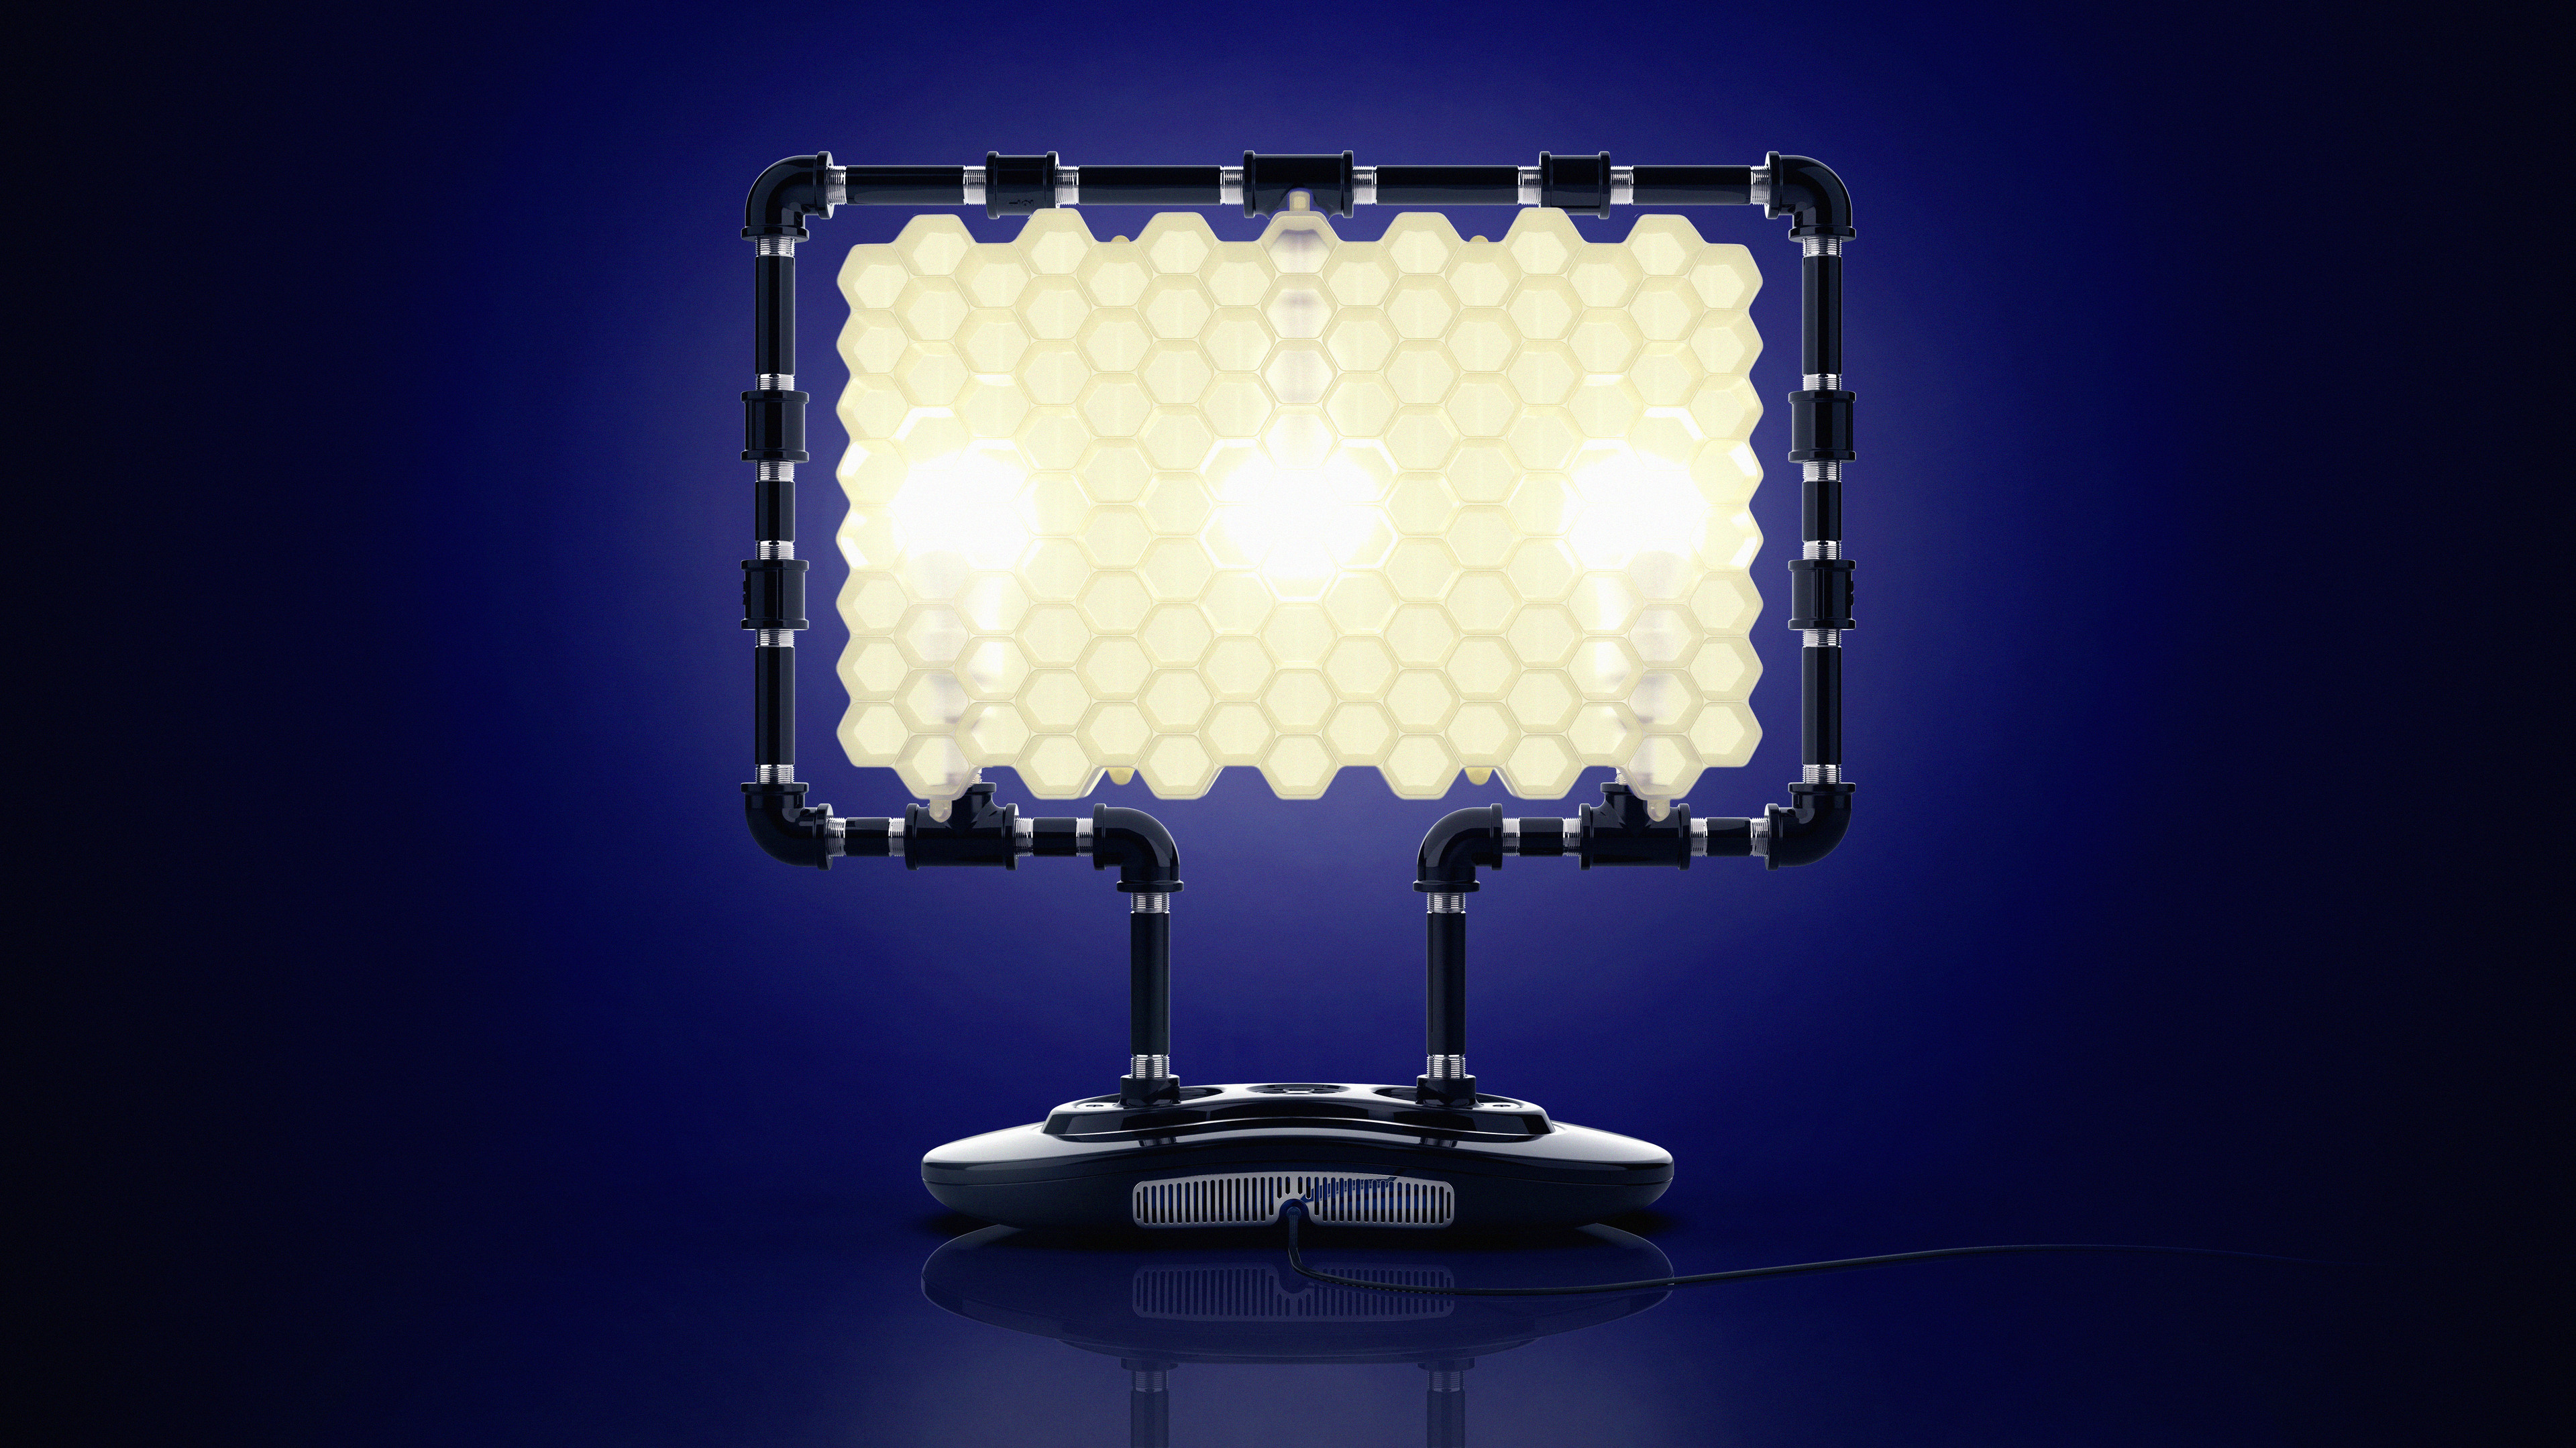
I imagine the lamp frame would be made of powder-coated steel pipe, the lamp shade made of injection molded acrylic (then sand-blasted), the base made of stamped aluminum and for fasteners, my personal favourite, neodymium magnets. The lights would be a dimmable, colour-changing LED bulb that could be independently controlled via Blutooth from your smartphone.
I included some of the Shapr sketches and some of the steps I took to make this design. I learned quite a bit from doing this, so if anyone has any questions I’m happy to discuss.
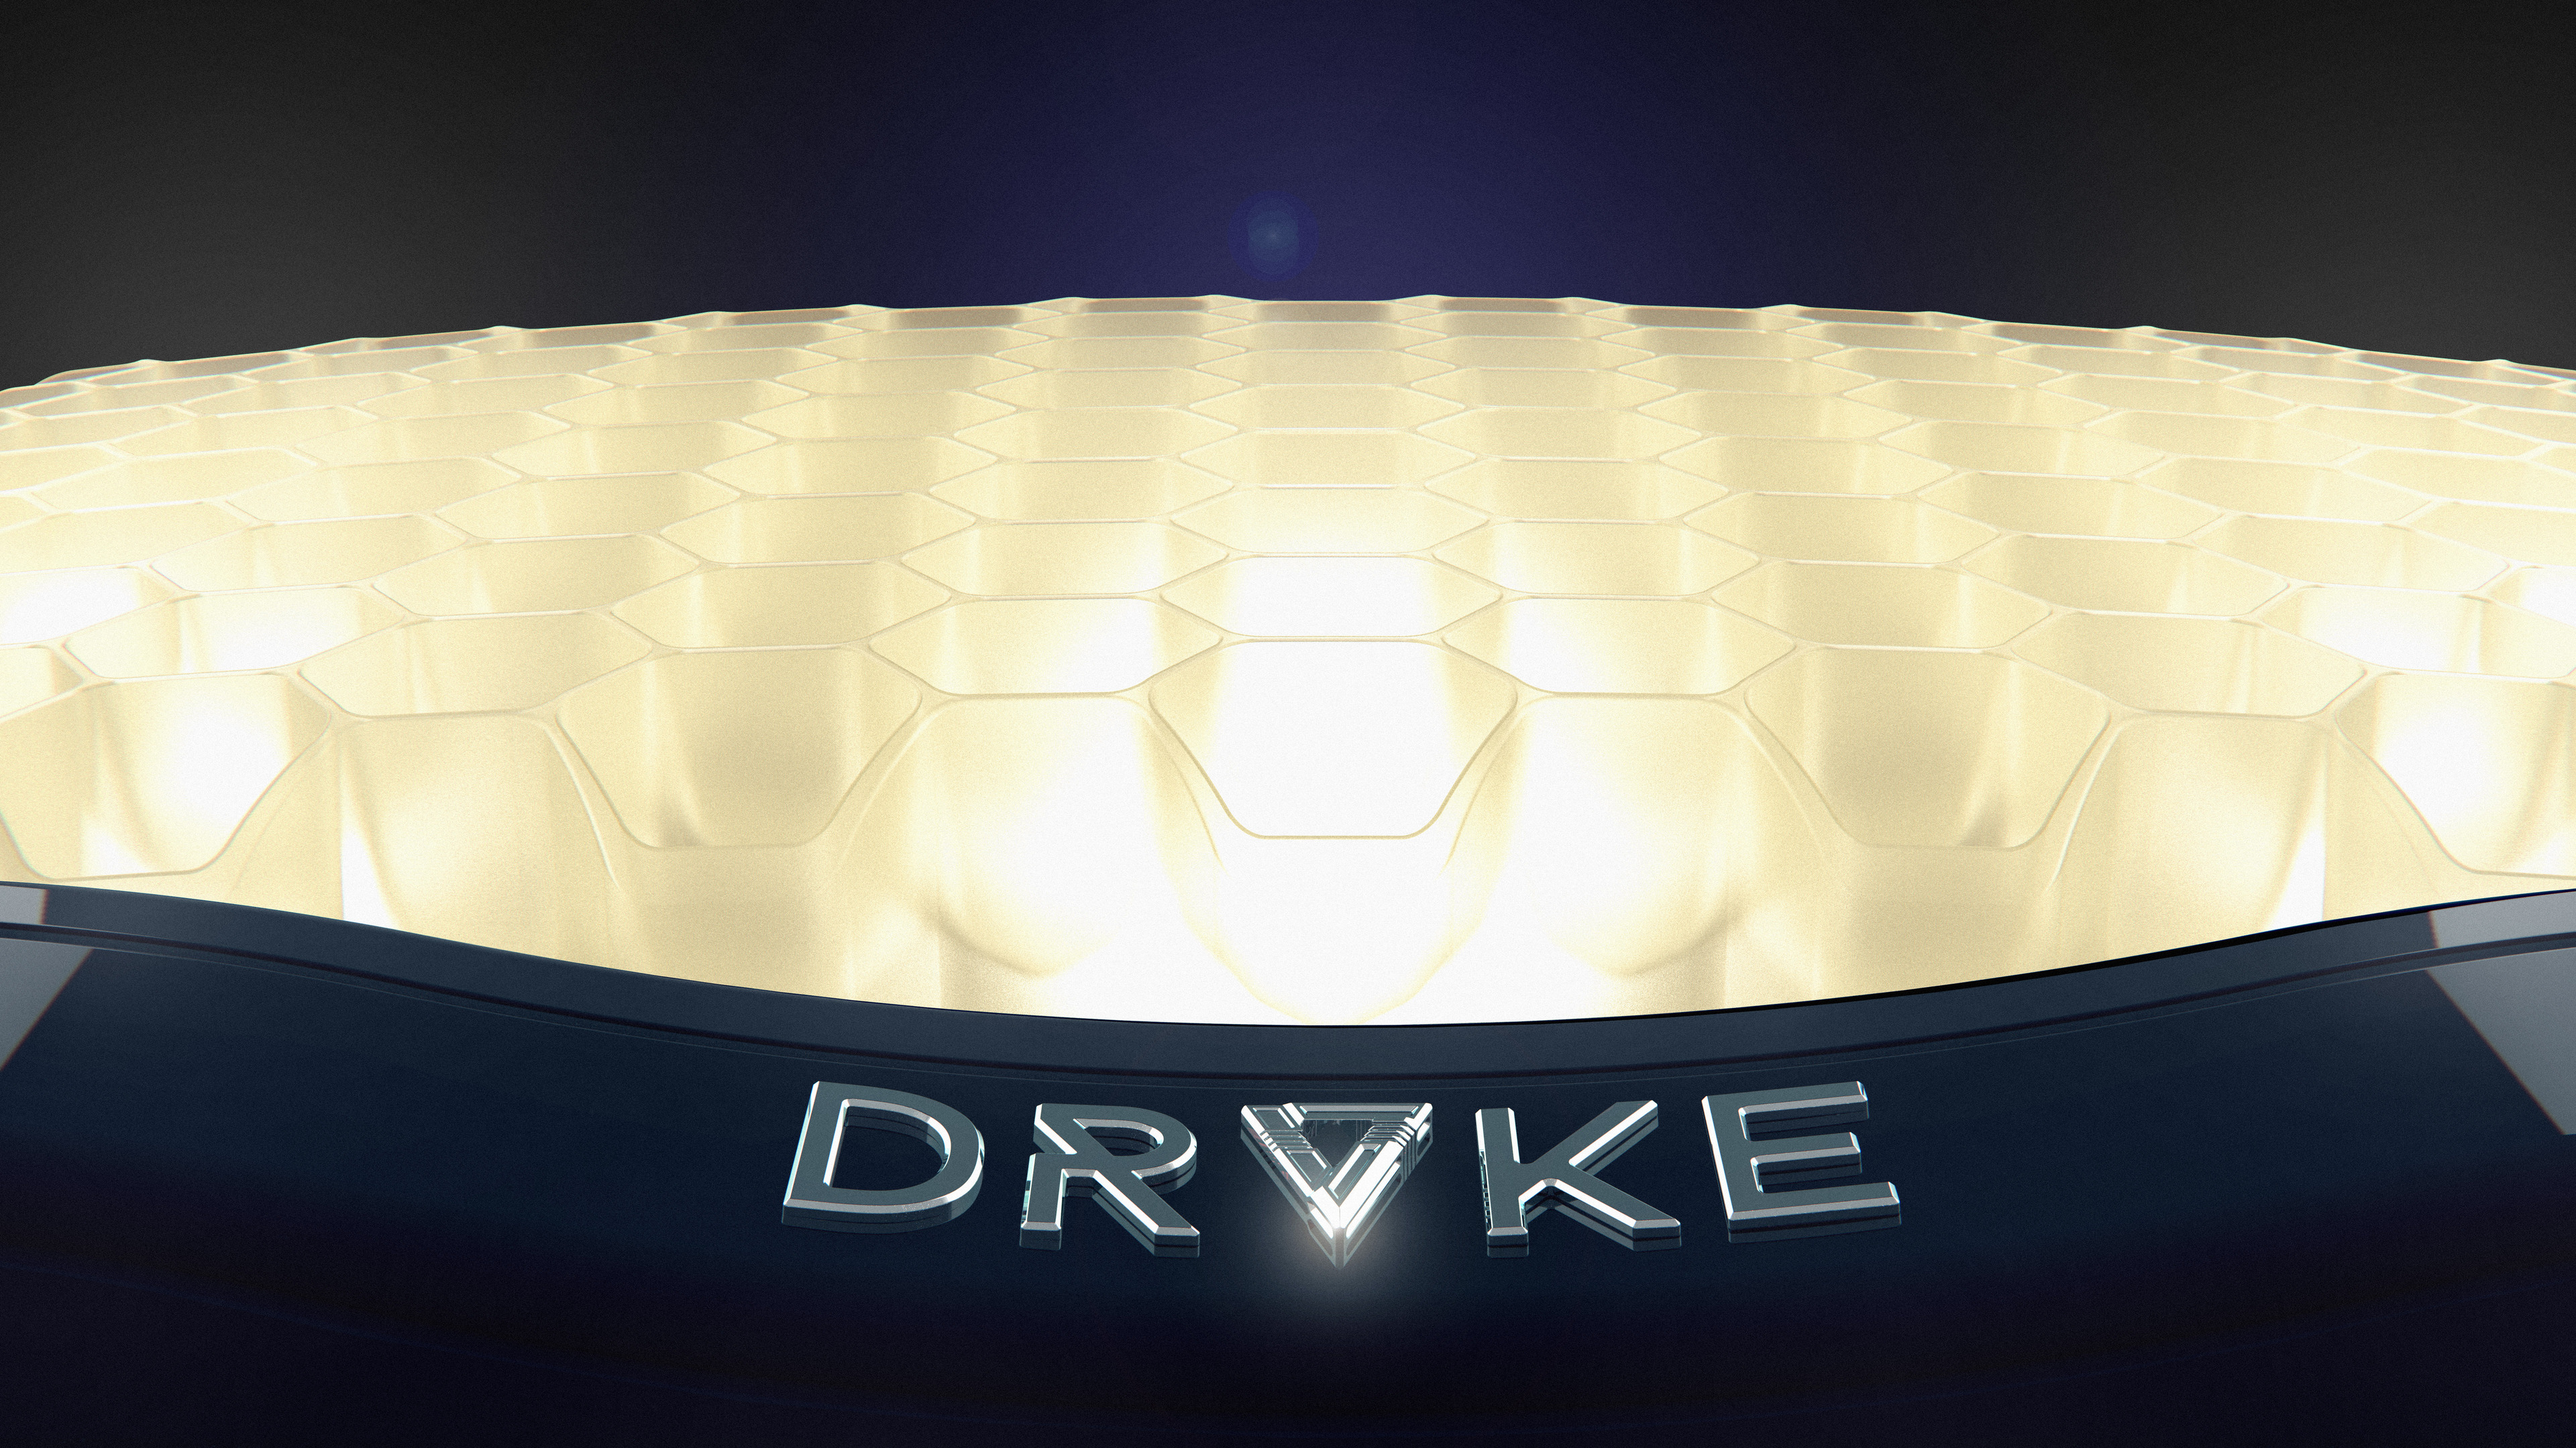
Import .STEP file to Keyshot 9 - set lighting environment, apply materials, set camera details (DoF, position, chromatic aberration. etc)
Export .PNG with transparency layer from Keyshot 9
Import .PNG layer to Photoshop - apply color filters, background colors, lens flares, film grain, etc.
Export hi-res .JPG for posting to this forum
Notes: 1) I export MASSIVE size renders from keyshot - like 600dpi at 7000k resolution because why not, they look amazing and allow more flexibility in Photoshop, and 2) because of the hi-resolution and complex lighting (projecting emissive bulbs through a semi-transparent plastic shade + environment lighting) some of these renders took 48hrs to make in Keyshot before they could be edited in Photoshop
Dude this is sick. I’ve been 3d modeling for many many years. Fell in love with it. I’ve only been printing for about a month. Learning how to 3d model is much easier than translating it to a working physical thing. I made a bong yesterday… turned out pretty cool and that bong made your lamp look crazier than it already is! You inspire me to get better.
Thanks dude. Careful smoking out of a 3D printed device - the heat from the flames could release toxins in the plastic that you could then inhale. Maybe not, just something to think about.
Hi, well done for this wonderful job!
My question is how did you export your file to keyshot?
When I export to .step, keyshot recognizes my part colors but does not recognize names.
So I have to name in keyshot each of my parts, which is really very long and very boring
If anyone has the solution to this problem, it would help me a lot