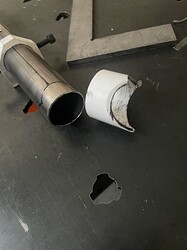
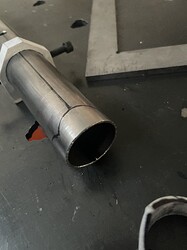
Hi I’m building a flue for a wood burner in my boat.
The flue tube needs to be offset with two mitre joints. As the burner and chimney do not align.
I have no problem producing the sketch showing 3 bodies mitred together. But to cut the tube I need to produce a flat projection of the resultant curve. Imagine slicing the mitred tube vertically and folding it out. This produces a bell shaped curve that varies with angle in height and circumference in length.
I can then print this at 100% Use it to mark the tube and cut it with my angle grinder.
There are programmes on the internet to produce these curves , But I’d like to be able to do it in shaper and be able to produce a complete set of drawings for the part.
Any help gratefully received
Hello @simon0863,
Sometimes I also need this and S3D doesn’t have this feature. So I find my own solution, but It isn’t that easy.
1/
I make object in S3D same as yours, I isolate just that bodies already Booleaned and export it as .obj.
2/
I import that object into blender (where I already have saved interface for this procedure to make it more easy for me).
Edit that body:
-delete all faces on the ends of tube
-mark seam on the longest edge
-Unwrap UV
-select UV end export it as .svg
3a/
Now I can open it in S3D and edit it save as .dxf and send for 4 axis cnc
or
3b/
Import it in Affinity Design (or whatever vector based graphic program), select all vectors and union them together to have just one outline shape.
Than I make one straight line same size as that seam i did in Blender and align unwapr shape to this line, to be sure the size are matching and it is 1:1.
So than you can print it and you have that stencil. (Don’t forget that paper has some thickness, so if you want to have perfect fit, you need offset your original body by the thickness of the paper)
This works for me, I make special save file on Blender and Affinity just for this procedure so now it is not that bad. But I will really appreciate some tool for unwrapping , that’s for sure.
I hope this will some how helps you
1 Like
Thanks very much @karel.works for my current needs ( I’m welding the tubes myself) small errors can be overcome in the fabrication process.
However the approach above will be useful for other projects thanks very much. Hopefully there will be an unwrap function coming soon.
1 Like
I am glad that I helped you.
There is also another solution if you have access to 3D printer. Because you can make a notch stencil block in 3D. Which is better for certain applications and smaller tubes where bigger precision needed.
I made some preparation tools and stencils for same propose (welding tubes)
fig.1 – Square fixture block w/ threaded hole to hold tube
fig.2 – Marker block with hole on top for marker, to draw line on the top. than you can measure distances and its good for drilling holes
fig.3 – Notch stencil blok w/ mark on top to align with drawn line to “perfect” alignment of notches
On the internet, there are lot of similar designs, but most time, you want make your own to match your project.


