I bought the Shapr3D subscription, even the iPad itself because I wanted to design an idea I had for a medical device. So far the program has been perfect for this. It turns out that I need to create a pringle shaped hyperbolic paraboloid plate that attaches snugly to a curved cylindrical design. How do I make this sort of shape?
Greetings,
I think Loft would be the tool to use. I had to look up hyperbolic paraboloid to see what it is and I don’t know what is a pringle shape is other than the potato chip.
Anyway, here I show that the first attempt at lofting 2 triangles does not achieve what I think you want however lofting 3 triangles comes closer. This may not be the answer but hopefully it can steer you in the direction of what you want to achieve.
-Mike
Thanks, I was able to cheat the shape using the same method I used to create the first curved body. Basically I drew a curve, then drew a circle under a point on that curve, centered it on the point and then did a sweep following the curve. Then I did another sweep with an offset and subtracted that body to make the first one hollow. Then I drew two lines on each face of either end and I think I used the replace face tool or the sweep tool again I can’t remember, I was fiddling with it a lot till it worked and forgot to note what I did. Then that created a second body basically out of the top half of the curved tube. Then I basically used the subtract tool to remove it. That made it into the shape I wanted. There has to be some easier way to do this though. I bet a half circle would work better.
Interesting. I understood about half of what you outlined. I’m curios though, can you upload a pic of what you made? I think we all would like to see what it is you described.
Thanks, Mike
break it down to it’s simplest components. make an neo-ellipse out of multiple set of tangent curves with a perpendicular lines at the centers, the more sections the closer it will be.
you could also try with splines and a point map based on basic calculations
@nmckaskle
This may be what you are trying to achieve?
This used Circular shapes but it could of course be adapted to use Splines:

Shout if you need more info.
That is exactly the shape pretty much, how did you do that? @Gelphyn
Also @TigerMike I am going to redo it again because while I sort of figured out a hacky way to do it, I didn’t get the measurements right. I’ll post a screen soon’s I can.
@nmckaskle
Be aware that this is written to be useful for the Community, this is only one method of achieving the objective.
Sketch 2 Concentric Circles [CC] and a Line to use as an Axis
Form the circles, as below, into Arcs leaving equal lengths either side of the nearest point to the axis line
Form a Closed Shape by capping the outer ends of the line in your preferred manner
It may be desirable to consider the manner of capping with regard to the required end result
Then Tools > Revolve the Closed Shape using the Line already drawn as the Axis


Tap on the Grid, using your Fingers, of the Sketch to give a square on view
Sketch a suitable Circle, with a view to obtaining the end result required, i.e., move nearer to the Axis to obtain a greater ‘wrap around’
Then form a Closed Shape tat can be used to remove the unwanted portion of the revolved Body
NB. This will be positioned on the ZX Grid, in this example, Select the 4 Edges [1 curve + 3 Lines] and use Transform > Move/Rotate to move the shape either behind [as shown] or in front of the Body ensuring it is not touching the Body:


Select the Closed Shape, as shown above, then drag the Double Ended Arrow through and beyond the Body in one movement:
Clearly the final Hyperbolic Paraboloid shape will depend on the choices made with Circle Diameters, CC spacing [for Body thickness] and Body Diameter controlled via Axis distance from the CC.
The rather sharp edge of the shape can be modified by applying a Fillet.
Greetings,
Nice job Stan. I’m always amazed with the many different ways of modeling to achieve exact or approximate results depending on the need of course.
@nmckaskle
Here I expanded on my approach using loft. It may or may not be what you are looking for, however various elements can be altered to achieve a variety of results. At least, you know of yet another way to achieve a curved surface.
Regards, Mike
Wow thanks I’m going to attempt to follow this and see if I can do it. @Gelphyn
Hi Mike. On a side note, how do you record your screen and have your finger taps and pencil clicks highlighted?
Go to your Ipad settings, and scroll down to Shapr3D. In the settings for Shapr3D turn on “Display Pencil and touches”. Then close Shapr3D to restart the app.
I just started to learn this amazing tool. Here is my method to build a Lays chip ![]() *im new user and can’t directly upload attachments so here is YouTube link:
*im new user and can’t directly upload attachments so here is YouTube link:


Very nice. I didn’t know you could rotate the loft. The previous methods used true arcs whereas when you rotate the loft, the shape looks truly hyperbolic.
I mentioned in my initial response that I had to look up hyperbolic paraboloid. In doing so I came across this video (of many) which is why I thought the hyperbolic shape was sought after.
-MIke


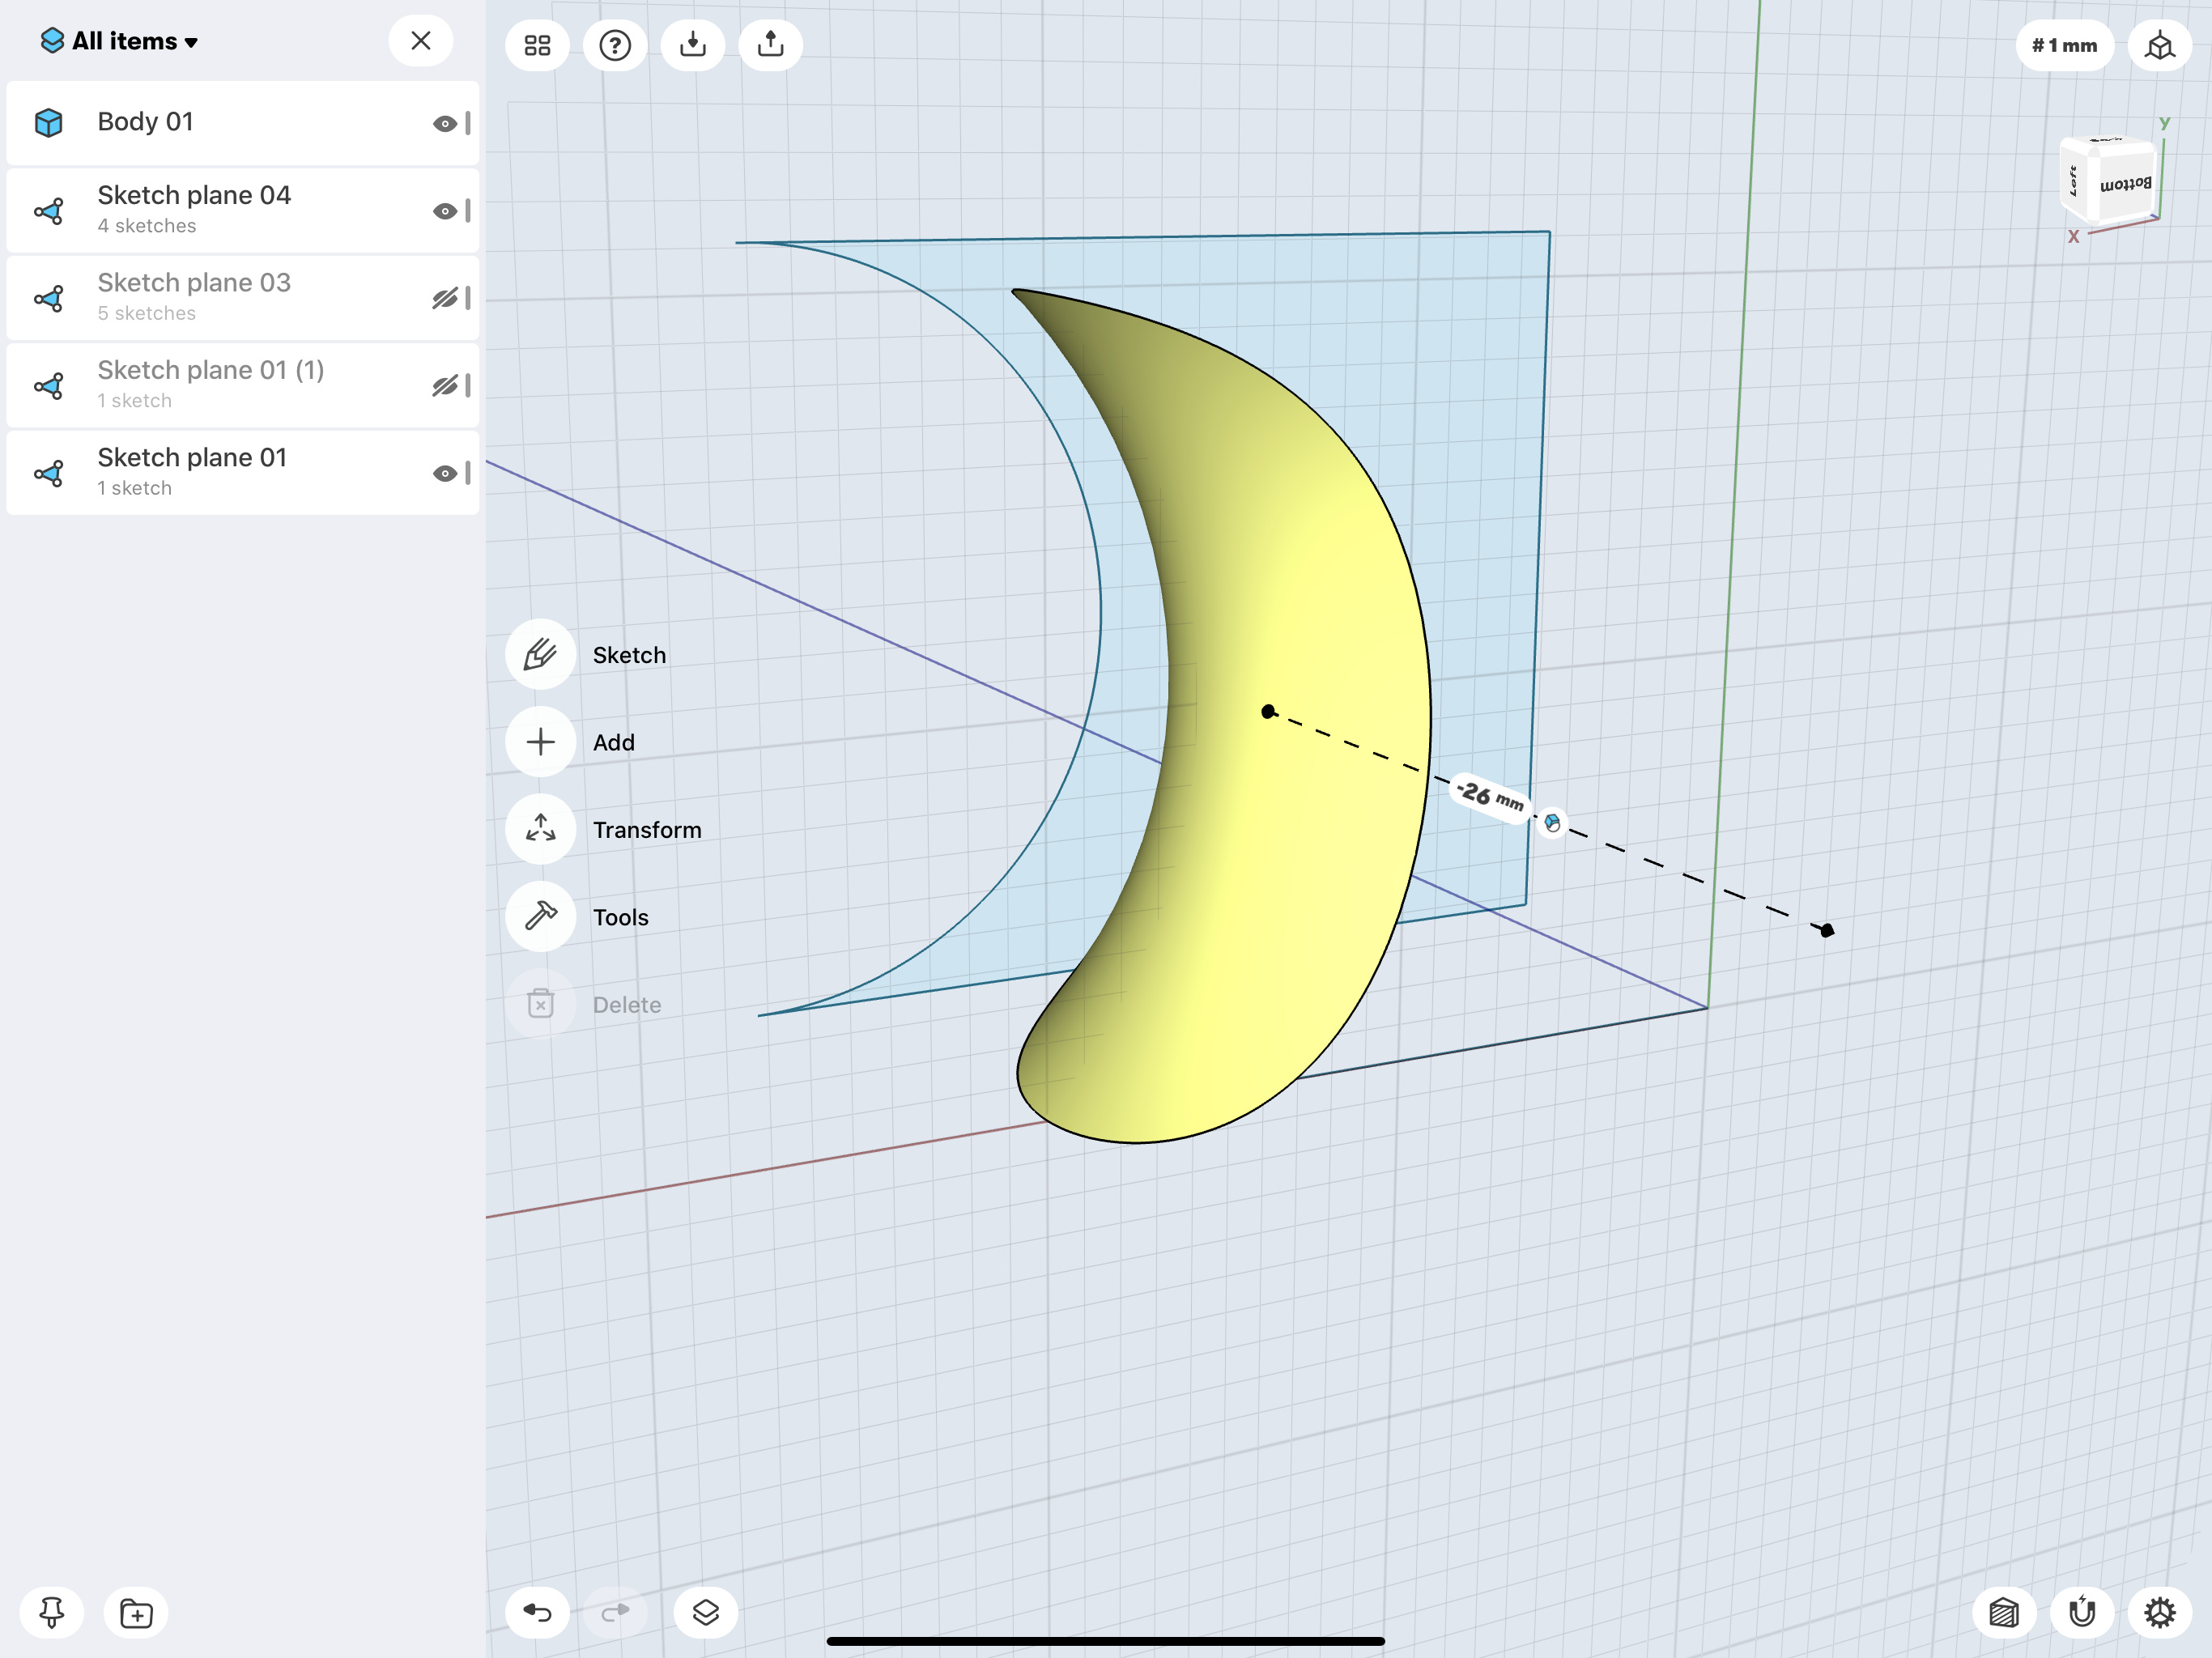
@iviivi thanks so much for that video, it was helpful and a lot easier to understand compared to screenshots and text. I don’t understand why the plane is appearing on the opposite side to where I poke though. I don’t know how to get it to record pencil movements and taps on the ipad but here’s what happened to me when I tried to copy yours.

I’m glad this was helpful. I literally just started using this app so don’t know exactly why construction plane appears on the opposite side, but my guess is that it is because the front side of the model is exactly that side where construction plane is appearing (see the 3D cube, the closes side to you is saying Back.) Good news the method will work anyway so select construction plane, double-tap on it, and build a sketch on it.
As for highlighted pencil clicks and finger taps see coment of McD upper.
Thanks I fixed the video of this strange behavior. You’re probably right though regarding front or back. I don’t know where it determines what is front or back. I have it set to left handed so sometimes it’s backwards.