Hi,
I am trying to learn how to create ruffles, pleats, or ripples as they are called in the instruction video called “Using Shapr3D to Ideate Industrial Design Concepts”. I’d I’d eventually figure out a way to create them on a straight surface. This was a tedious process that no doubt I did the most laborious way possible. I have no idea how I could continue these around a curve.
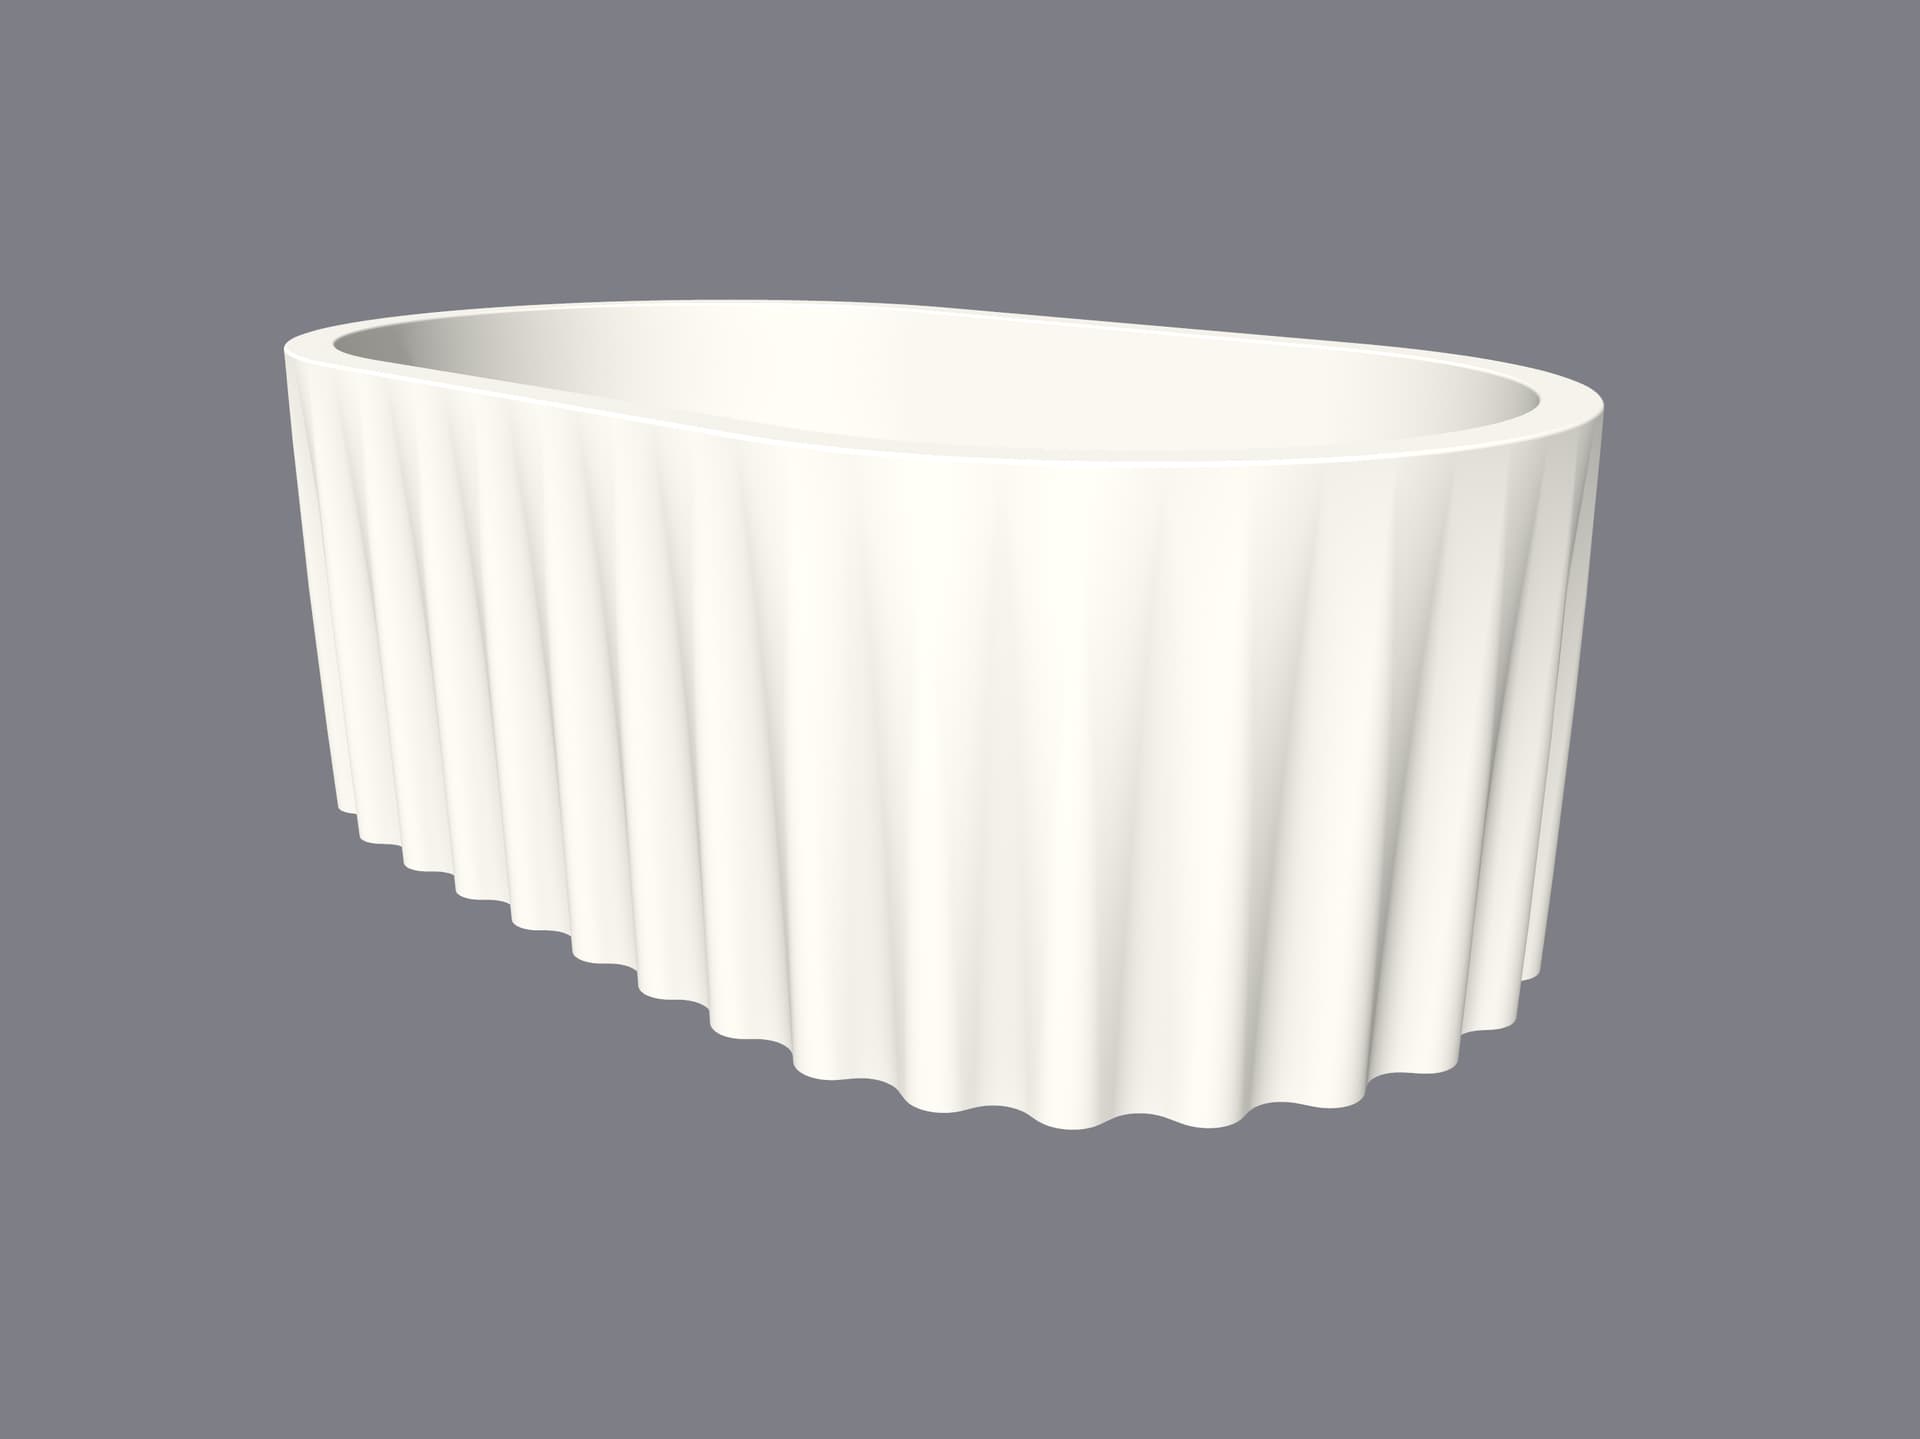
Notice there is no ruffle at the top, i.e a straight line and only the bottom is wavy.
d) copy and translate sketch to fit the desired width. Since you want ruffles from one edge, you simply remove what’s inside the translated sketch as the picture show
Remark: The angle of the edges in picture b) is to be changed depending on the number of ruffles you want. I’d say the best general “look” would be to measure the outer most distances between the tops in the straight part of b) and then compute what angle that corresponds on the curve. Then insert the correct number of edges and use spline
Thank you guys. I did what I set out to do. I tried both ways. @Einar I started with yours. I must have done something weird with my sketched because all the loft lines kept screwing and I just could not get a clean loft. I didn’t want to go back over it so I moved onto @TigerMike ’s way. I thought I had it, and I got the result I was looking for. But, when I came back here to thank you guys I realised I did it in a slightly different way again.
Well that´s what it’s all about! I love the fact that you could learn something from both me and a master like Mike, combine the knowledge and use it as your own. That’s the goal, if you simply copy+paste you seldom learn as much. Nice work! And props to you for asking!
Everyone, I wanted to add participation in another way so that everyone can benefit that there are several ways to reach a solution. Greetings Aalaayed .