Strange loft bug and a weird workaround

The problem is simple, I’d like to make a loft between two similar profiles but I can’t. I found a very strange workaround though that makes me 100% sure that the loft should work how I imagined originally. It’s gonna be a bit long, bear with me.

Edit: macOS 13.5.2 / Shapr3D 5.450.0 (5689)

I created some splines on the front (XZ) plane and I rotated some of them around the Z axis, these are gonna be the guide curves.

I added some circles for better understanding how I rotated them:

I also created a closed profile on the top (XY) plane by connecting the intersection points with a spline:

As the guide curves intersect each other at the Z axis and I cannot loft to a point or a line, I added a construction plane to intersect the guides a little bit earlier. This way I have the very same intersection points so I can sketch the end profile:

So at this point I had the start profile, the end profile with the same number of points and the guide curves. Making a loft between these should be easy, right?

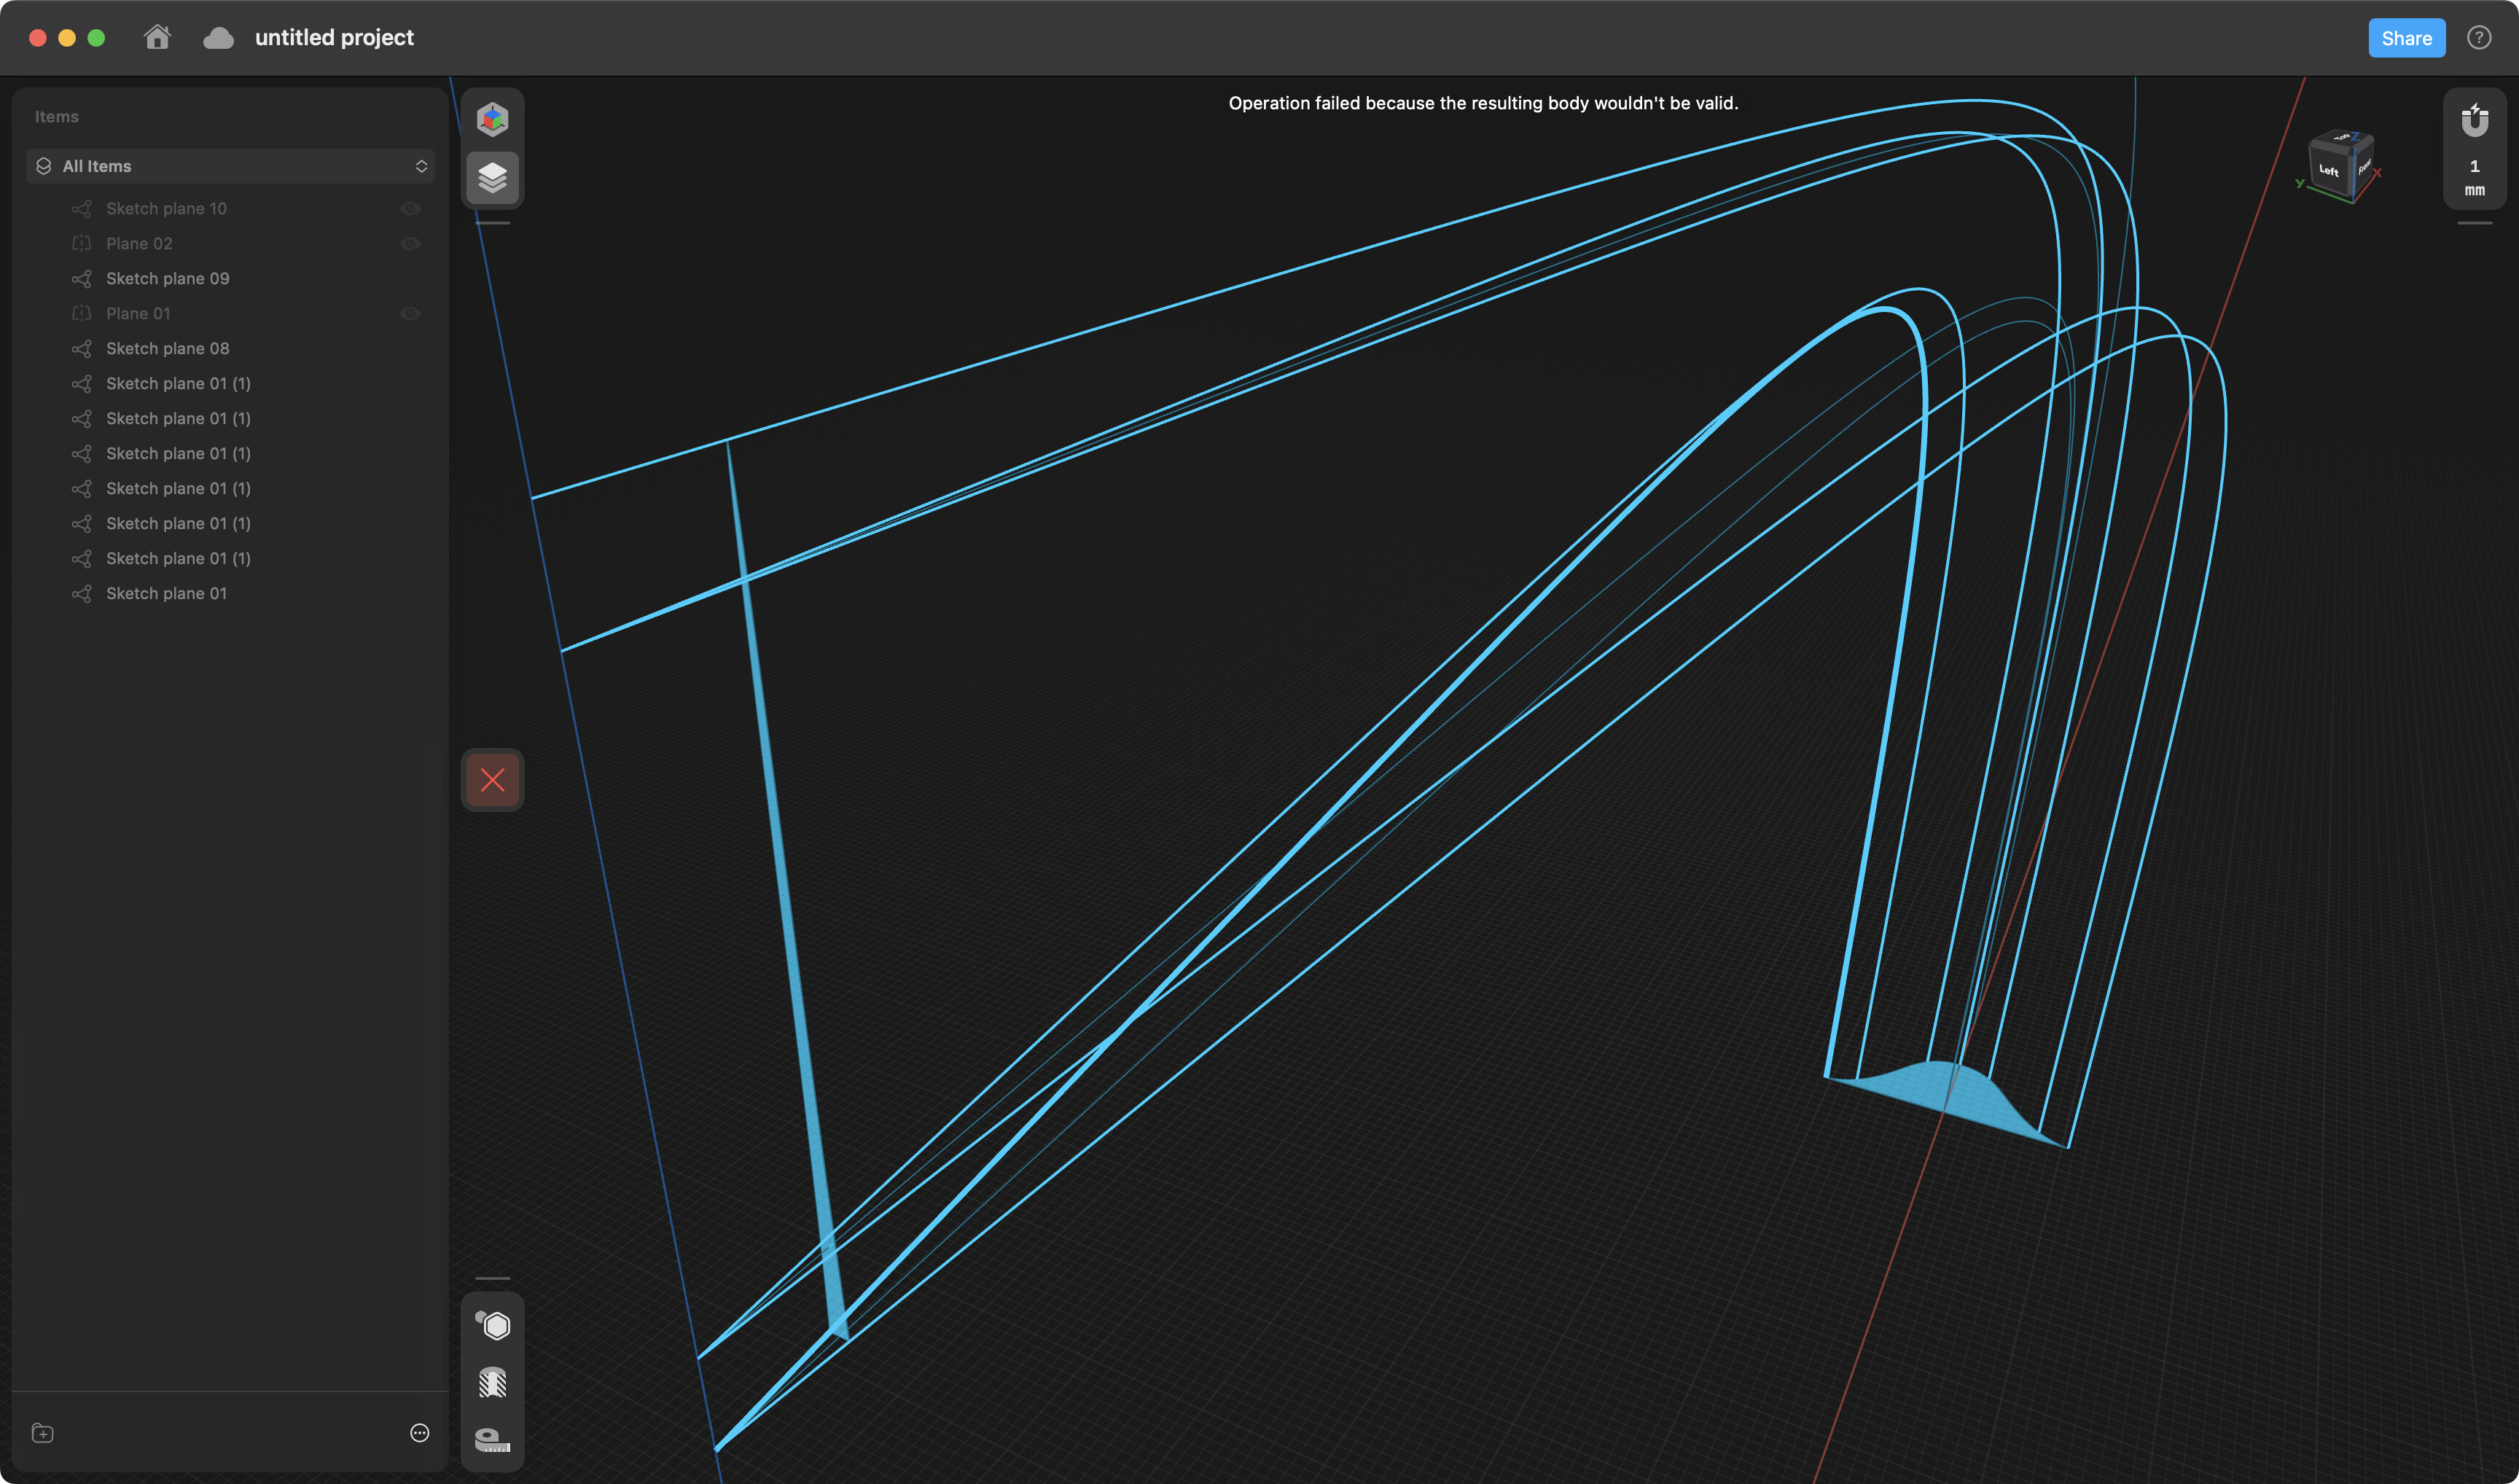
Well, I selected the profiles and the guide curves and when I clicked on the Loft tool I got an “Operation failed because the resulting body wouldn’t be valid.” error. I double checked my profiles and made sure the profiles do use the intersection points. I saw this error a couple of times earlier with the loft tool when the profiles were misaligned. I ended up triple checking my profiles and I even redrew both of them. Twice. It didn’t work.

I remembered that I debugged the misaligned profiles/guide curves by clicking on the loft tool first then adding the profiles and curves one by one. So I tried that and it almost worked but every time I selected the very last guide curve I saw the same error. I tried to add the curves in different orders as well.

I added the curve on the right side last:

Then I added the curve on the left side last:

The small end profile is hard to see so I decided to add another construction plane and add mid profile. I tried to use this as the end profile temporarily to make the loft but also didn’t help:

I almost gave up but my inner beta tester had an idea. I started cutting up my profiles to smaller pieces and tried to make smaller lofts. The first one resulted in the same error:

My second try was successful. Finally, I had a small chunk of my profile lofted properly:

Out of curiosity I tried to loft the first piece again and… it worked?!

I tried to loft the remaining part together but obviously it didn’t work:

At this point I thought making a loft would work with 3 control points only but to my surprise I could make a loft between these profiles:

The remaining part had 4 control points as well but didn’t work, I needed to make another cut:

But at this point at least the bottom part worked like a charm (unlike earlier):

And with the last little piece my loft is done:

And since I could unite them together to have the body I’m supposed to make with 1 click only I’m pretty sure there is no gap between them:

So, questions:

  • Who is wrong here? Did I make a mistake somewhere? I even read the manual but I don’t see any limitations like this.
  • Why is it working sometimes? Like the first (left) bottom part didn’t work but at the end the (right) bottom part worked. These are the very same profiles but mirrored.
  • I was also wondering about convex/concave profiles but some of them are still concave. It might sound stupid but maybe mixing them is the problem? Same with the number of control points. I was able to use a profile with 4 points so that must not be an issue. Still, when I tried it again I failed.

forgot to mention, my weird workaround did the trick with the tiny end profile as well:

1 Like

I wasn’t able to loft from the shape to a line so I made the ‘line’ a small rectangle instead and was able to loft between the two…

I had run into that problem earlier so it’s not a line, it’s a small sketch using the same points very close to the end of the guide curves. I know i’t s long post but somewhere in the middle I switched from the tiny sketch to a way bigger sketch and the loft tool still didn’t work.

I created a small project where I could replicate the bug. I attached the .shapr file.

I have a slight suspicion that it’s connected to the Offset Edge tool because in the original project even the Trim tool didn’t sense the endpoint of the newly created spline as it was misaligned a bit. Now this is something I cannot prove and I wouldn’t have been able to replicate in a different project but it would explain what’s wrong with the Loft tool in this scenario. It wouldn’t explain why is it always a different curve guide that’s misaligned though but the only “special” thing about these lines is that I used the Offset Edge tool to produce them.

Update: You can ignore my comment about the Offset Edge tool (I leave it here for clarity) because I redid this example with simple circles as guide curves and it doesn’t work either. The error message was different this time, it says “Fault detected in a guide wire.”. But it’s always the last selected guide curve again. I attached this project as well.

Update 2: I did a silly experiment and I recreated this project with straight lines as guide curves this time. Although I don’t need to select the lines because that’s the default shape of the loft when I do I have the same issue. Attached this project as well.

loft-bug-spline-guide-curves.shapr (6.7 KB)

loft-bug-circle-guide-curves.shapr (6.3 KB)

loft-bug-straight-guide-curves.shapr (5.8 KB)

i created an ultimate test file with lots of cases:

rows are the methods/workarounds i tried:

  • method 1: simply using the loft tool
  • method 2: breaking up the faces into smaller pieces by adding lines to it. all smaller pieces have 3 points only. it’s like triangulating my face except i still have some spline edges.
  • method 3: i had another idea for a workaround that would be faster (in terms of making the loft itself). it’s breaking up the splines into smaller splines to have start and end points only. it turned out to be a tedious process because using the break/join constraint change the shape of spline itself so i needed to use the trim tool and remove every other section then draw another spline and trim what remained from the first one.

here is a screenshot about the two workarounds:

columns are the shapes i tried to loft. i used the intersection points on 2 different planes to draw the 2 similar shapes:

  • shape 1: line + spline with 1 curve point
  • shape 2: line + spline with 2 curve points
  • shape 3: line + spline with 3 curve points
  • shape 4: line + spline with 5 curve points (this is what i used above when i discovered this issue)
  • shape 5: simple triangle, it cannot be simpler than this. i added this at the end after failing with everything else and this didn’t work either.

guide curves:

to make it simple i used simple arcs this time. i drew some concentric circles and trimmed them to leave a quarter only. then i rotated some of them around the Z axis.

results:

spline 1 spline 2 spline 3 spline 5 triangle
no workaround failure failure failure failure failure❗️
smaller faces failure failure partial success partial success -
broken spline failure failure failure failure -

i even tried to use the two workarounds at the same time to have small faces surrounded by small spline sections only and that was a failure as well. i just didn’t have time to add a fourth row.

in all cases i could use one or more guide curves but when i added all i got various error messages, see my earlier comments. i tried all the combinations, i tried to add them in different order and nothing helped. the only partial success i had was with some small faces but i couldn’t finish the full loft.

i attached the file to help debugging this.

loft-bug-ultimate-test.shapr (149.0 KB)

5.460 didn’t solve this issue

Hey @gex,
Thanks for the very detailed description and for the attachment :wink:
We’ll investigate the issue, which is caused by the connecting guidelines. For workaround, if you trim the end of a guideline which is connected loft will work fine.

hey @H_Daniel! thanks for the tip, it worked! i didn’t think that the connected guidelines can be a problem but this explains why cutting my face into smaller pieces worked in the original project. this workaround is easier and faster for sure.