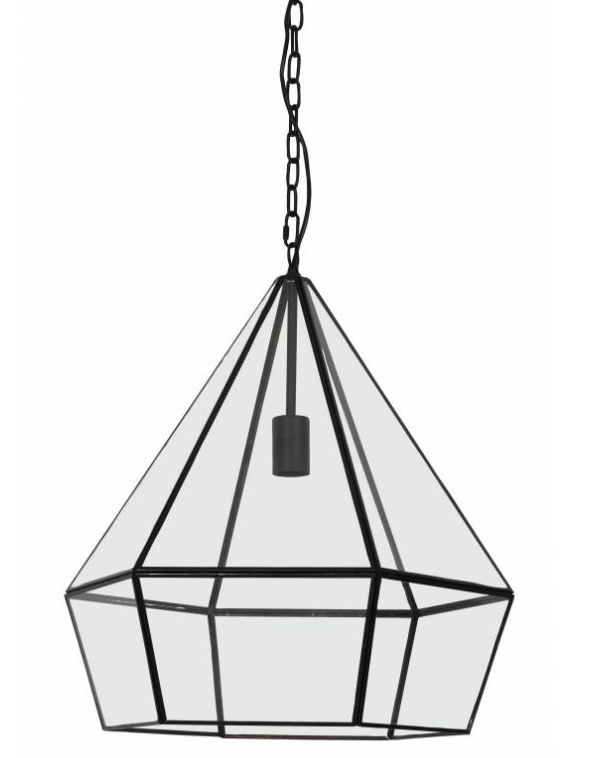
I start to make 2 hexagons of different size and a circle
then I place in height the largest hexagon and the small circle
then i loft except that
I can’t keep only the edges
excuse me for my english i’m french
There are many great ways to work with bodies in Shapr3D. Here is yet another method.
You can use the Scale tool. This is useful for playing with shapes if you want to see by ‘eye’ how things will look like after altering.
If you want precise dimensions, you can do a little math to determine the exact scale reduction percentage.
Regards, Mike
And, Happy New Year to all in this great forum and to the team at Shapr3D !!!
@djazzy
If you want a Circle, or another Hexagon as shown in your detailed Image, at the top Loft your choice to the Large Hexagon.
Click Done
Select the Lofted Hexagon Face only and Loft that to the Smaller Hexagon.
Decide whether to create a Single Body [Tools > Union] or leave as Two Separate Bodies
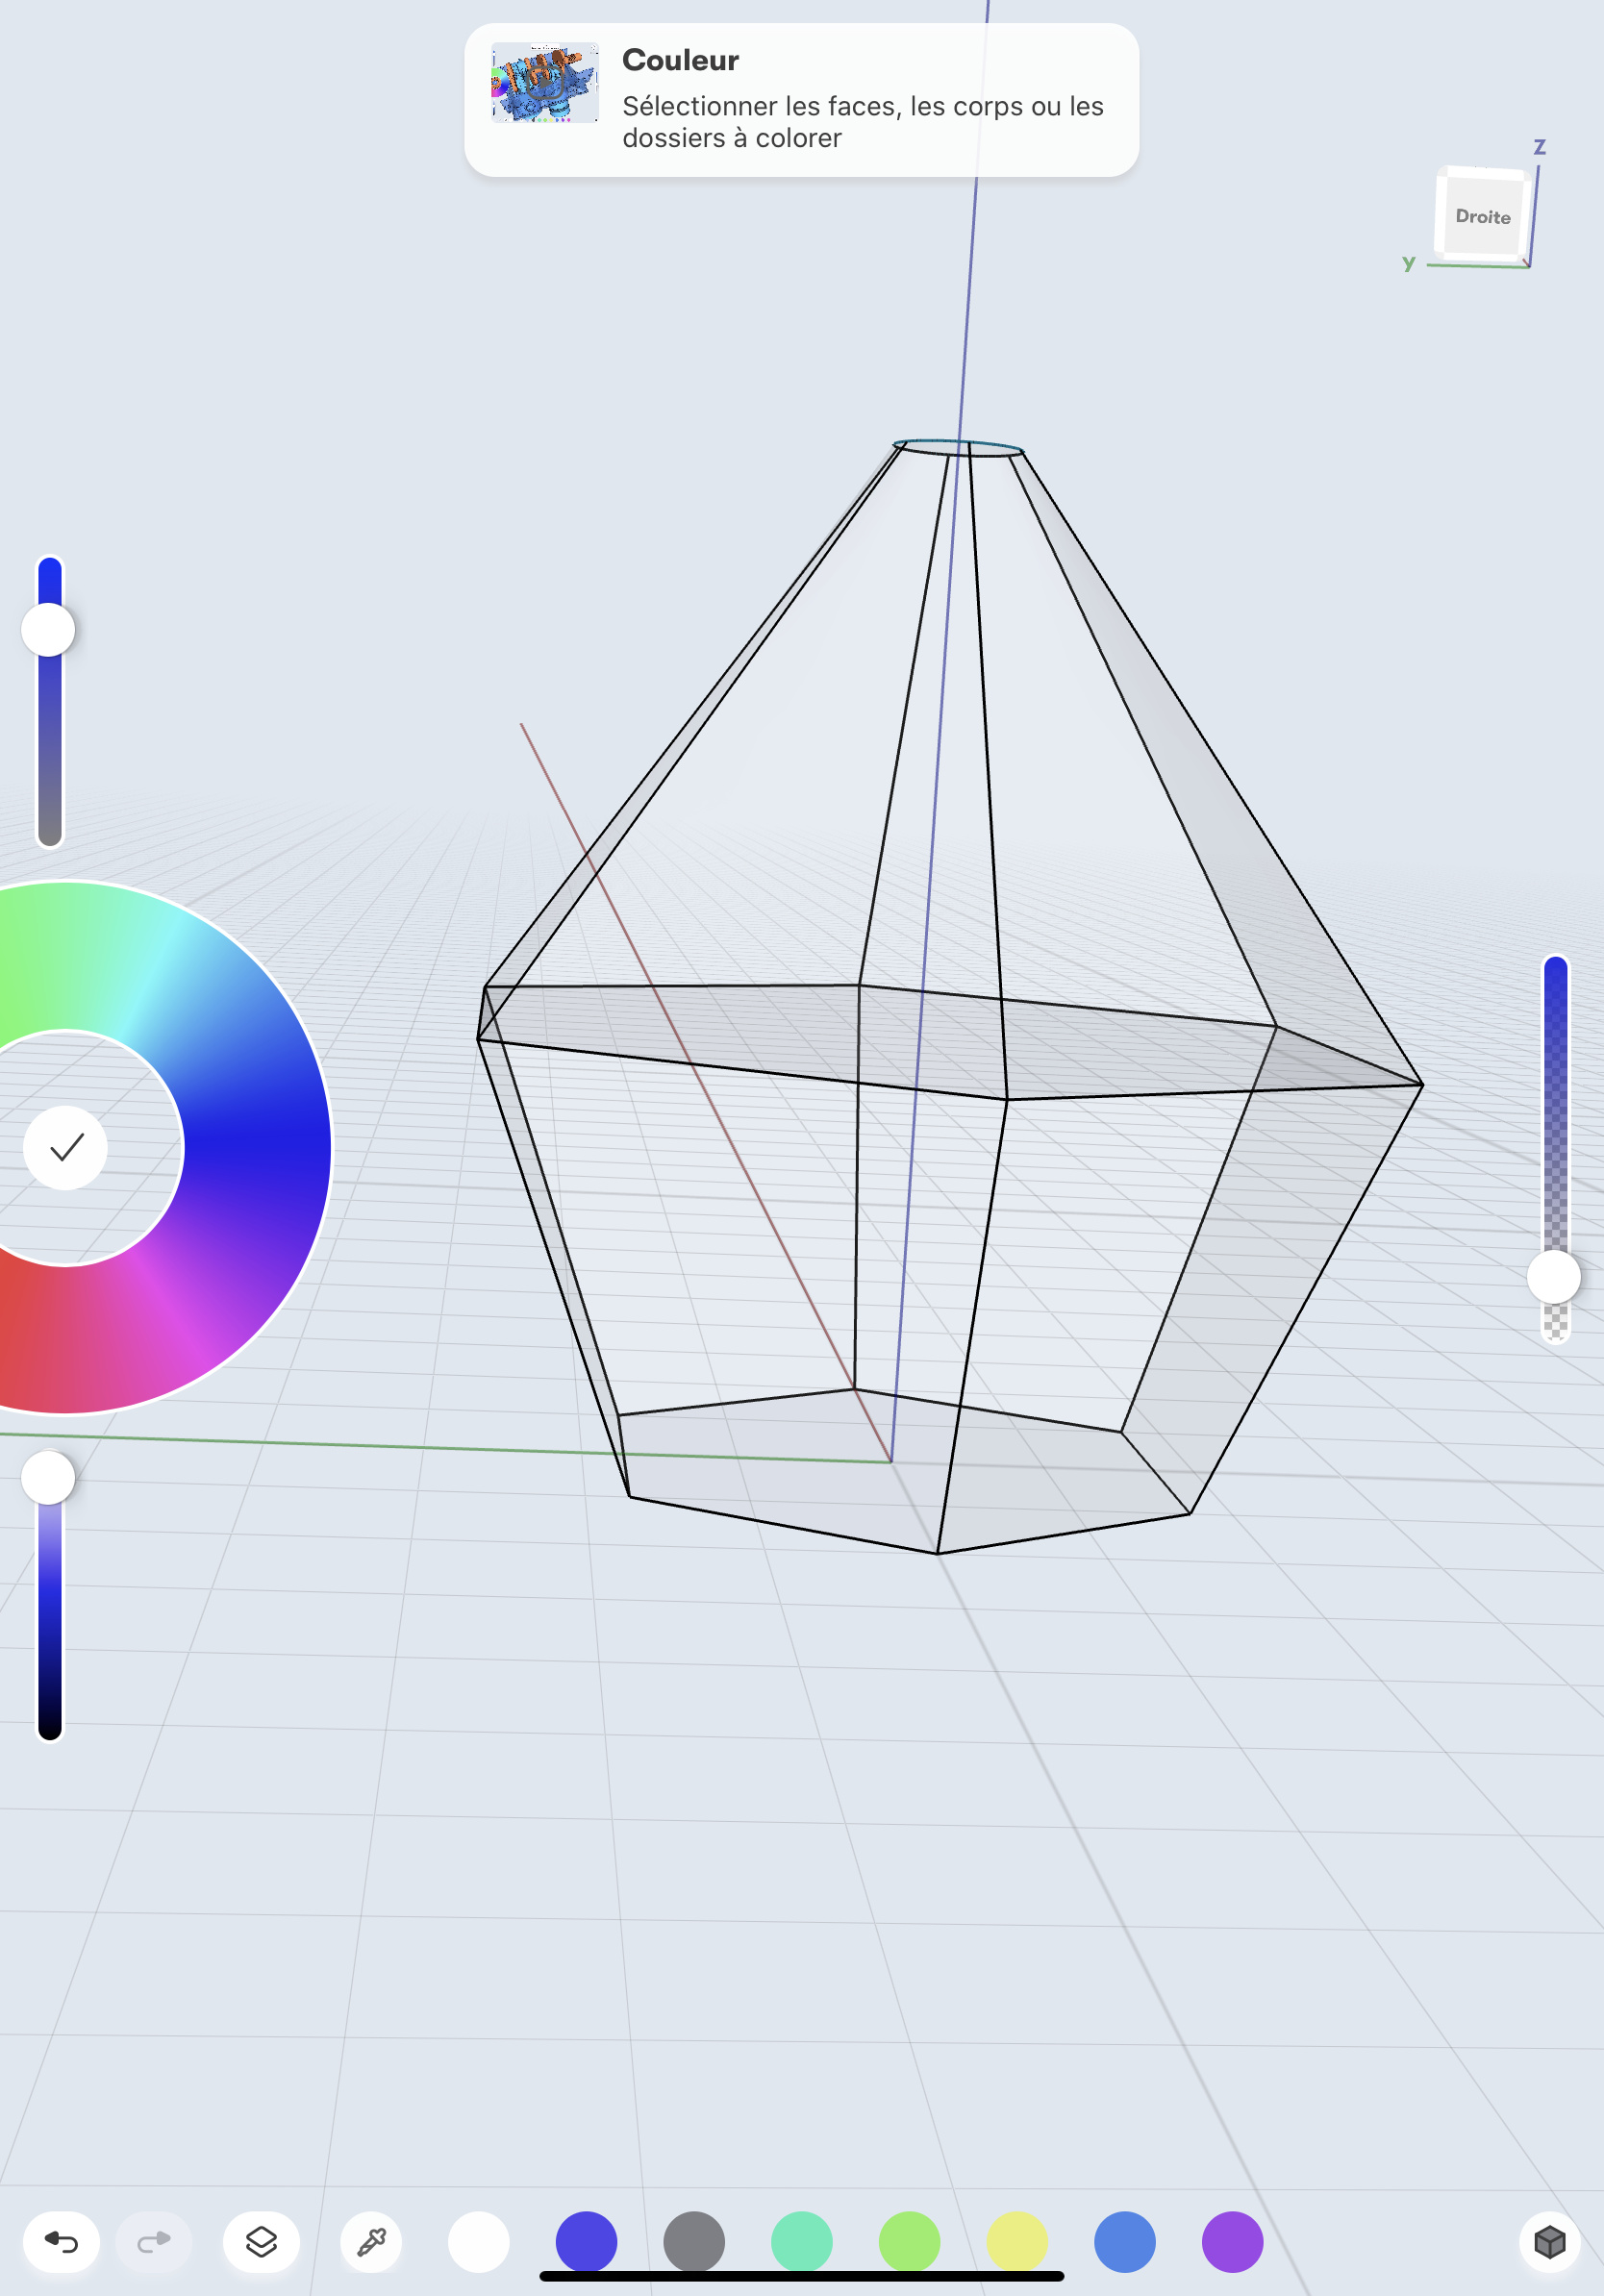
To display only the Edges Select the Body or Bodies then Tools > Color
Use the Righthand Opacity Slider to gain the effect required:
Thank you for your answers!! I managed to put the part in transparency however if I convert the file to stl to print it in 3D, I think that I end up with full faces!
thank you all again, I’m trying to make myself understood
@djazzy
Thank you for your question, follow up and perseverance to overcome a language barrier. I hope you are enjoying the experience as much as me . I have gained much and had lot of S3D fun
If you consider this ScreenShot to be approaching your requirements, and will be satisfactory for the intended Production Process, it may be worth reading on?
Be aware that this is only providing a Butt Join between Glazing and Frame, if you find the Sketches obstruct your workflow Hide rather than Deleting them, some are used more than once.
Using appropriate dimensions it would be possible to produce Stepped or Grooved housings for the glazing. It would be interesting to learn:
If the Butt Join can be used for Printing?
How the Printing Process would be deployed, e.g, 2 Filament single pass or separate passes for each Filament plus Adhesive or ???
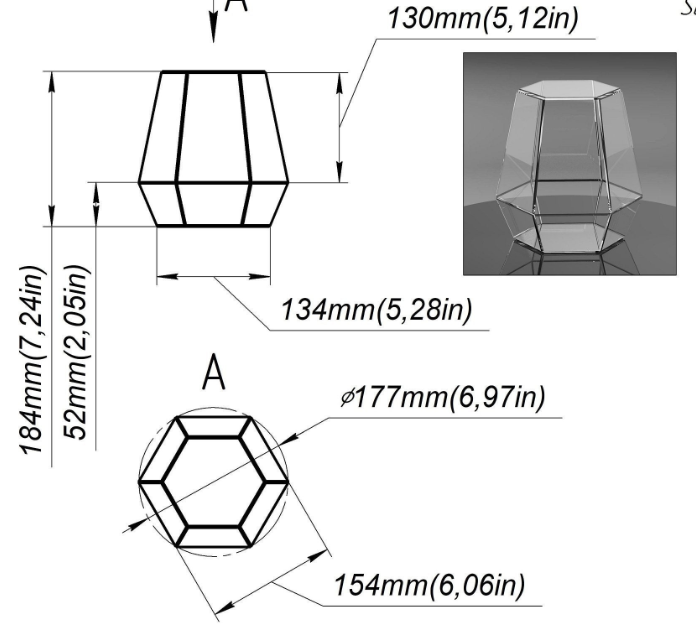
To create something similar to ScreenShot below construct the Tapered Hexagon using the method you prefer.
Note that the Small Circular Top has been replaced by a Small Hexagon to enable the following process, and only one panel has been shown ‘glazed’.
Tools > Shell > Select the Bottom Hexagon Face > Next > Set Thickness [top left] to your choice [3 mm in this case] > Done
The Hexagon shape will be hollowed leaving a Shell.
Choose one of the Faces that will require Glazing and Tap on it with your Finger Add > Construction Plane > type Offset > NextDo Not Adjust the Offset Value > Done Sketch > Line/Curve > Create a Closed Sketch by drawing around the perimeter of the chosen face. Items > Plane 0# [representing the Plane just used] > Hide Tools > Offset > Drag one Edge of the Closed Sketch inward by a similar measurement to that chosen for the Shell Thickness.
Alternatively drawing all the Closed Sketches, selecting all of them and then going to the next step is an option.
Revert to 3D View and Select the newly created Closed Sketch and Push the Double Headed Arrow through the Shell.
Repeat the processes necessary to form the entire Hexagon Frame. Items > Body 0# [representing the Hex Body] > Hide
Choose the Faces to be Glazed, Select them and Push to the required Thickness [in this case 1.5mm]
Apply to all appropriate Glazing Panels.
If required Transform > Move/Rotate > adjust the position of the Panels within the Frame Depth. Tools > Color > Select the chosen shade and opacity Transform > Move/Rotate > Move the Panel inward by the appropriate measurement.
Repeat to ‘glaze’ all appropriate Faces.
Repeat the whole process for the Lower Hex Body plus its Bottom Face.
Pleased to hear you are enthusiastic about the possibilities, remember this is just scratching the surface of S3D capabilities.
Hopefully you will find it easier to do, in ‘steps’, than the appearance suggests?
Very much looking forward to seeing your results, best wishes for a productive New Year.


 . I have gained much and had lot of S3D fun


