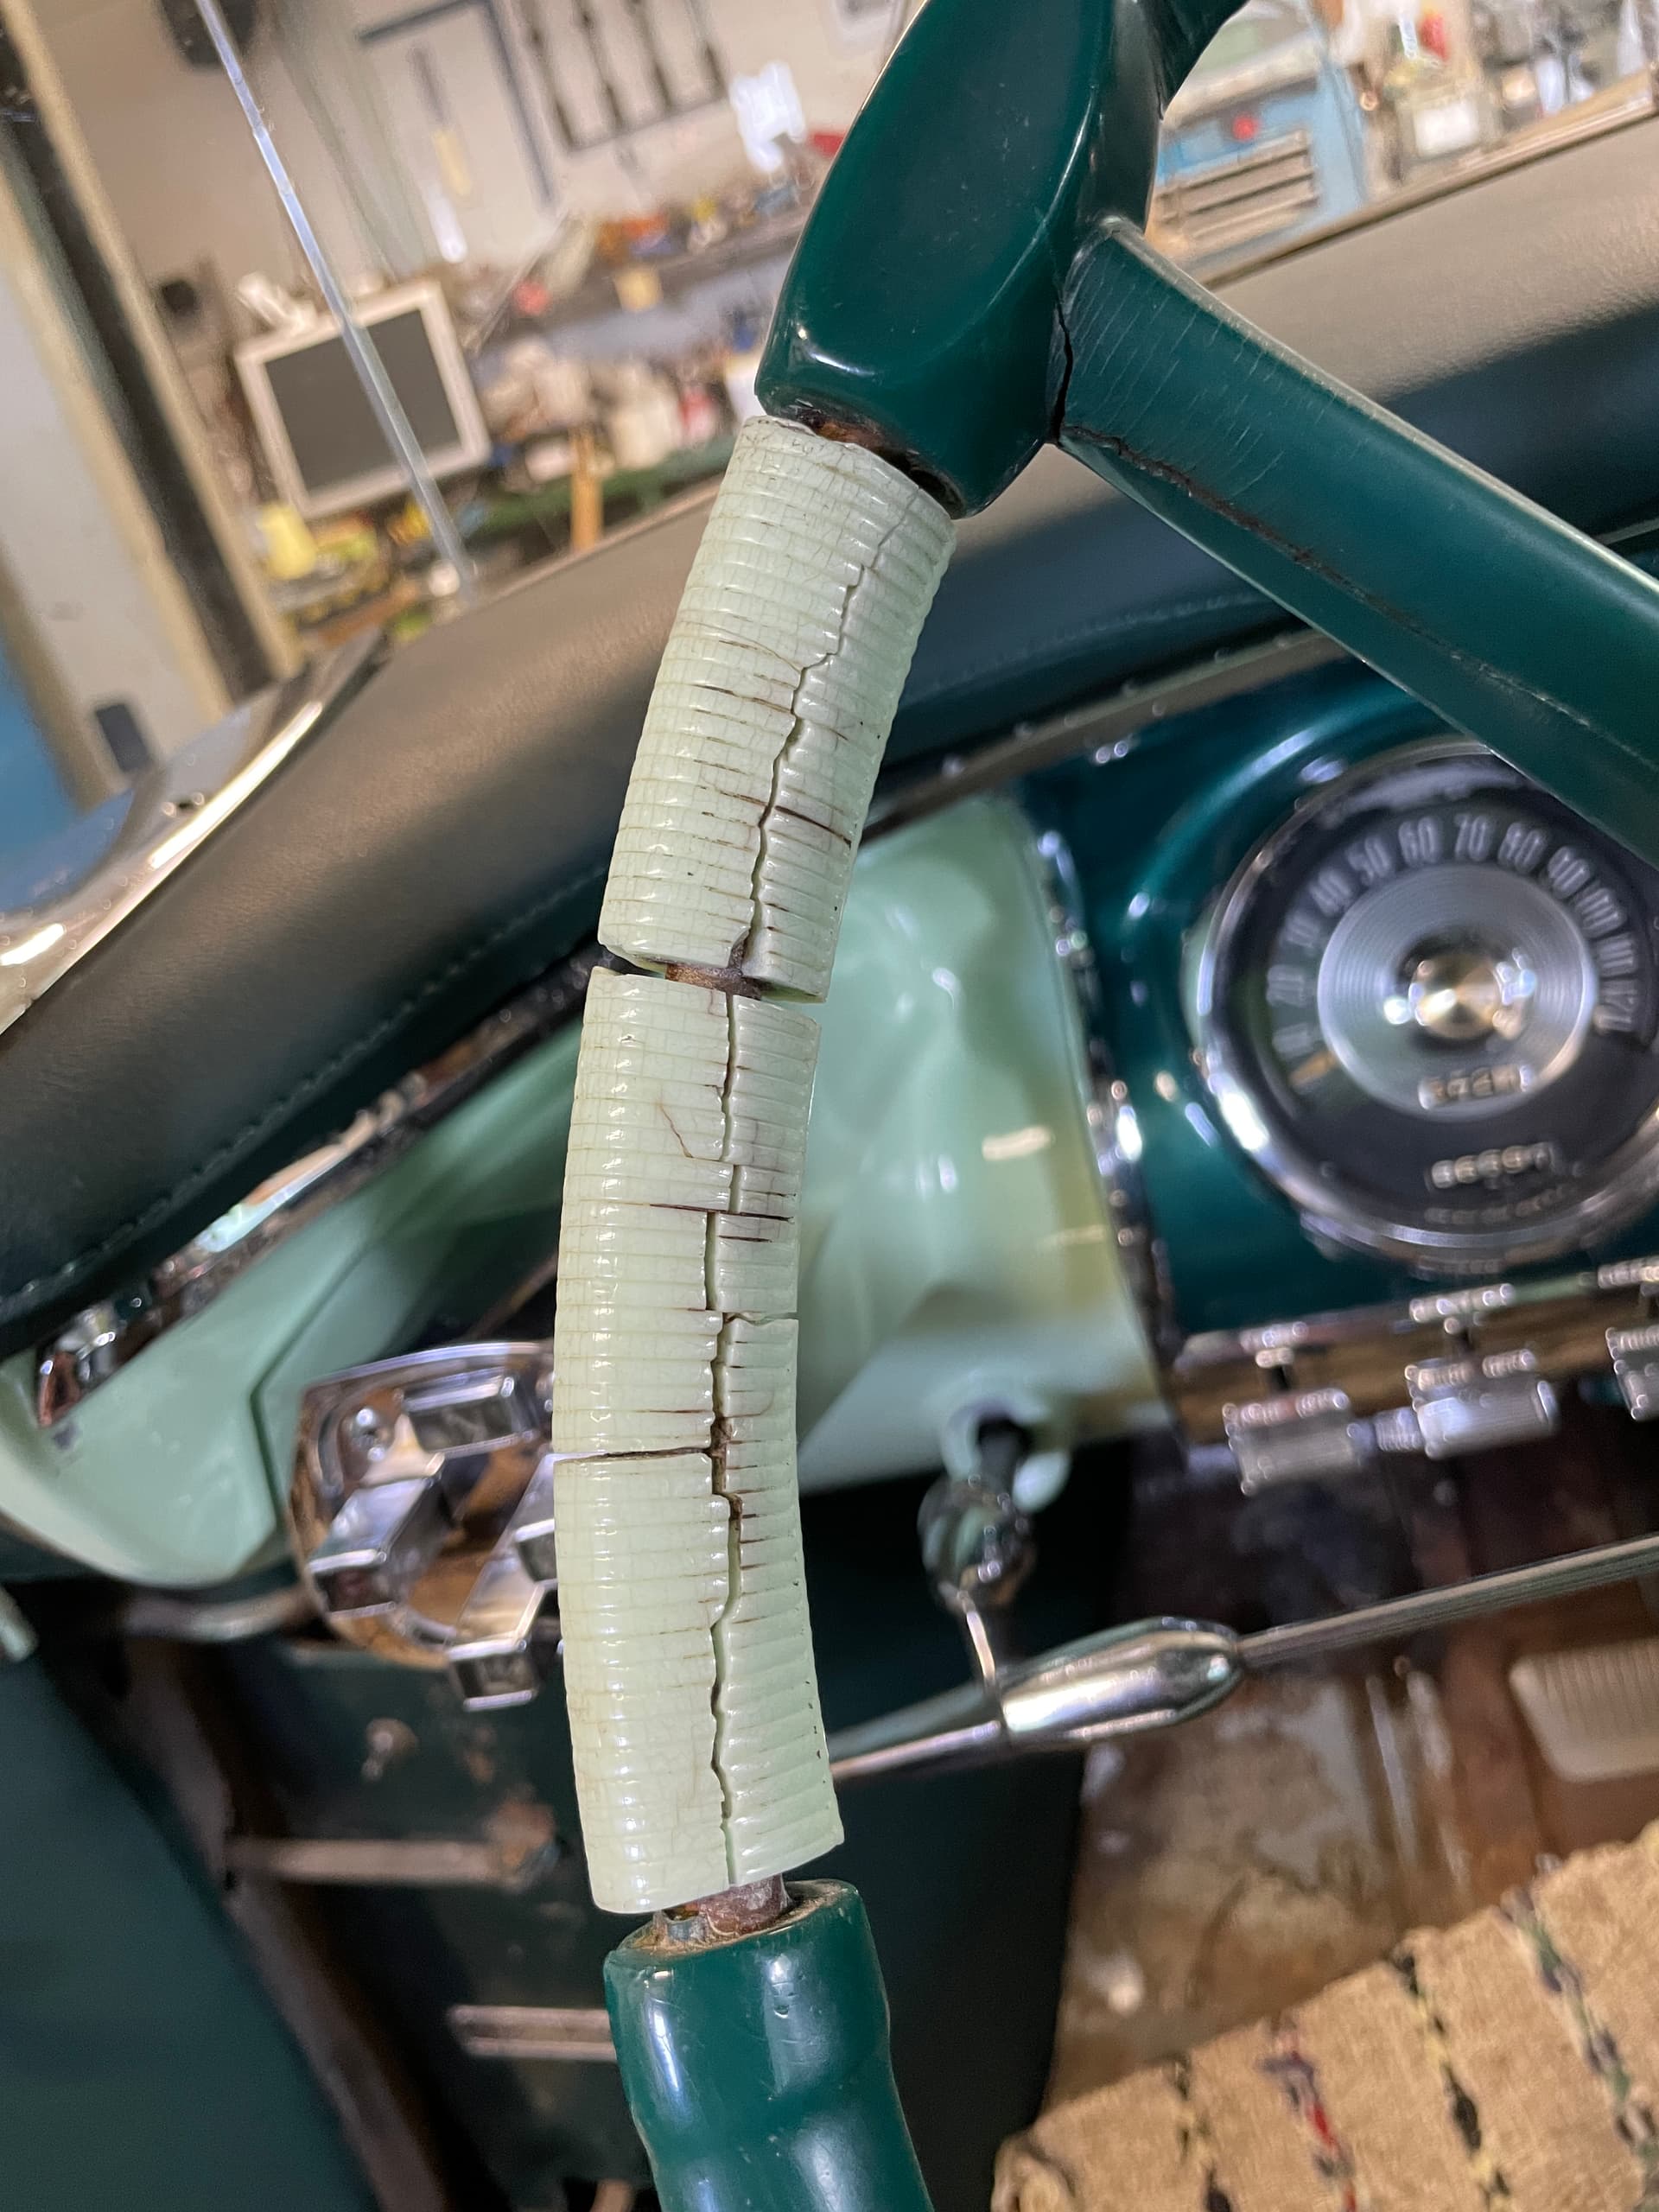
Hey! I am renovating one of my cars and thought of trying to 3D print or mill this part of my steering wheel with my CNC. How would you draw the part and these grooves in shapr3D?
Regards Eric
I’d draw the outline of what you want then revolve
Work out you measurement with a vernier calliper and you should be good, if wasn’t at work I’d do a vid to show you, btw sweet car.
If you have the iPad Pro you also scan the part just as guide as the part is obviously done for lol
How about this: Figure the radius. Figure the distance of the gap in the wheel (if the part weren’t there). Count the segments in the part. Divide the gap distance by the number of segments. Create one segment with that number. Copy the segment by rotation from the center of the radius and then add the bodies together.
I think of that part like the old hammers with the leather handles that were stacked layers of leather. In this case I’d treat it like that.
Also remember if your grooves are in the wrong place say wrong death or which you can also use offset face to obviously correct this.
Thanks for your tip 
Nice. If you decide to 3D print, what filament do you intend to use?
Nice job of it! I would add mating posts and sockets to the interior of the halves. That way they align and you get better adhesion when gluing them together. Not hard to do either. However it will make printing a little more difficult. You coucl make sockets in each half and separate alignment pins.
Good idea! I post the finish result here, it might be a winter project though. It’s still season for cruising 
Thanks  I probably use PETG but if so I might treat the surface to a nice finish and do a mold ant cast the parts in resin.
Cast the part in place. That’d be a trick,
Hmm  True and that would be as close how they did it in 1956.
Looking forward to seeing that!
Btw all you experienced 3d printers out there, would it work to print the mould and then cast from that? Would the mould release if it was printed and coated appropriately?
I have printed parts and molds on my multiple 3D printers. The results depend on the capability of the 3D printer. My resin based Form3 printer makes amazingly good molds. I don’t use anything other than Shapr3D to draw the designs.